September 21st
 Finally got around to looking at the dashboard, which is probably the major
thing left to do. However it became apparent that there was a problem. A while ago, while fitting the steering
column, I had wondered what to do with a small spacer that the manual tells you to put under the forward mount.
It was obvious that it wouldn't fit there for me. Chris Masters said that it could go wherever you felt like in
order to move the wheel about slightly. I decided to use it to raise the wheel slightly, always a useful strategy
given the length of my legs.
Finally got around to looking at the dashboard, which is probably the major
thing left to do. However it became apparent that there was a problem. A while ago, while fitting the steering
column, I had wondered what to do with a small spacer that the manual tells you to put under the forward mount.
It was obvious that it wouldn't fit there for me. Chris Masters said that it could go wherever you felt like in
order to move the wheel about slightly. I decided to use it to raise the wheel slightly, always a useful strategy
given the length of my legs.
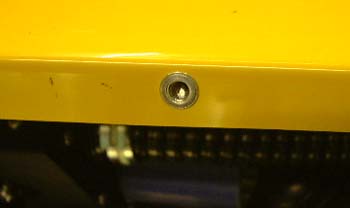
You can see the spacer in this photo.
However, it now seems that with this spacer in position the wheel is moved up far enough that there isn't enough room for the instruments between it and the top of the scuttle. <sigh> I guess this means that I'll have to take the spacer out again. This is going to be a bit tricky due to the amount of silicone sealant that now seals the gap between the column and the engine compartment. Moving the column probably means disturbing all this gunk.
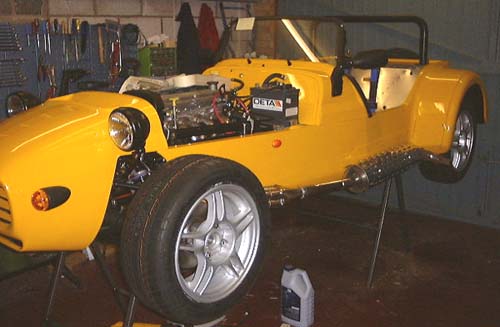 I finished the day by putting the wheels on. It looks even more like a car! This weekend
is scheduled to be magic drop-down day. I've been wondering how to do this for a while. The recommended technique
is to lift the front of the car with an engine crane and then kick away the stands while a bunch of large blokes
hold up the back of the car and drop it down gently. I had been thinking that this was impractical owing the the
lack of anything at the back of the car to hold onto--other than the bodywork which seems to be in the "it
came away in me 'and, guvnor" category. However, perhaps it's possible with just the wheels? I can just about
lift the back of the car on my own with one of these and with a few people it might just be possible.
I finished the day by putting the wheels on. It looks even more like a car! This weekend
is scheduled to be magic drop-down day. I've been wondering how to do this for a while. The recommended technique
is to lift the front of the car with an engine crane and then kick away the stands while a bunch of large blokes
hold up the back of the car and drop it down gently. I had been thinking that this was impractical owing the the
lack of anything at the back of the car to hold onto--other than the bodywork which seems to be in the "it
came away in me 'and, guvnor" category. However, perhaps it's possible with just the wheels? I can just about
lift the back of the car on my own with one of these and with a few people it might just be possible.
Perhaps I'll ask those nice cam7 bods for a hand this weekend...
The yellow sticky, by the way, is reminding me to tighten up the front wishbone to hub bolts before I put any weight on it...
 I never did get to ask the cam7 people, as Anthea got struck by a fit of enthusiasm and
we went out and rented a hoist and, with the help of a trolley jack, a couple of axle stands and a stack of building
blocks we lowered the car to the ground. (Not forgetting to do up the bolts mentioned above.)
I never did get to ask the cam7 people, as Anthea got struck by a fit of enthusiasm and
we went out and rented a hoist and, with the help of a trolley jack, a couple of axle stands and a stack of building
blocks we lowered the car to the ground. (Not forgetting to do up the bolts mentioned above.)
The most obvious thing is that it's shrunk. The car looks half the size it did on the stands, it's also clearly going to be more difficult to work on. The first job, though, should really be to tidy the place up a bit. It looks like someone's been building a car in here.
Before the grand tidy-up, I had a bit of a look at the dashboard again. I now think I should be able to leave the spacer in, although the scuttle might need relieving a bit so that the tachometer will fit. The problem is that the dash itself--which is aluminium covered in sponge and vinyl--is clearly too big. As far as I can see the only solution is to chop about 10mm off the top of it. The problem with this is that the vinyl will need to be unstuck and peeled back somehow. I assume that we'll be able to work out some way to stick it back again. The only saving grace is that the crash pad will cover up the edge of the dash anyway.
I got a form from the Vehicle Inspectorate today. It seems to be a request for extra information before the SVA. Specifically, it wants me to confirm that I have assembled the engine, transmission, suspension etc., onto the chassis myself. Very strange. I ticked the "no I did it all meself" box and sent it back.
September 23rd
 I finally decided that the crash pad, the padding that goes around the edge of the dash,
would cover a multitude of sins and I could, perhaps, get away with just fitting the dash as it is, albeit with
the hole for the column enlarged somewhat to allow the slightly relocated column to fit. So, I set about attaching
the dash. This is done by drilling straight through the dash into the flange around the scuttle. According to the
manual the dash should be held on with bolts and nuts, but I followed some advice given me by someone else and
put some rivnuts into the scuttle flange. This means that the dash can be bolted on and off without having to fiddle
about behind it to get at some nuts.
I finally decided that the crash pad, the padding that goes around the edge of the dash,
would cover a multitude of sins and I could, perhaps, get away with just fitting the dash as it is, albeit with
the hole for the column enlarged somewhat to allow the slightly relocated column to fit. So, I set about attaching
the dash. This is done by drilling straight through the dash into the flange around the scuttle. According to the
manual the dash should be held on with bolts and nuts, but I followed some advice given me by someone else and
put some rivnuts into the scuttle flange. This means that the dash can be bolted on and off without having to fiddle
about behind it to get at some nuts.
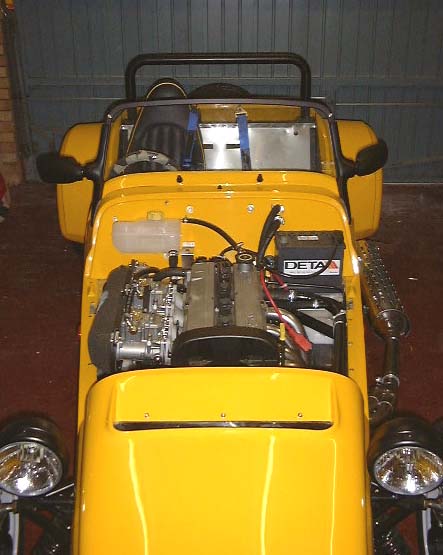
 With
the crash pad and instruments in place, it now looks like this rather gloomy photo. Note, however, that there are
no switches and lights on the dash as yet.
With
the crash pad and instruments in place, it now looks like this rather gloomy photo. Note, however, that there are
no switches and lights on the dash as yet.
The crash pad is going to have to sit at a slightly odd position, but I think it should be possible to hold it down well enough. It's attached just by velcro but I think it'll be OK.
It's a lot easier doing this stuff now the car is on the ground, I'm getting quite good at hopping in and out, even though the absence of a seat means there's rather further to go all the time.
I bought some petrol today and put it into the car. As soon as I've got the instruments, well the oil pressure gauge, connected I'm going for a switch-on. Should be this weekend sometime, barring serious problems at work.
September 24th
 At
last the insurance arrived today. However, as I'm very close to running the car I need to upgrade it to real insurance,
not just the off-road variety. I did a bit more admin by phoning the VRO and after failing--again--to contact the
chap there who does kit cars, one Mr Hill, I got the helpful person to send me the forms I need: a V55/5 to request
a registration number and a V627 which identifies, in a largely meaningless manner, the things that went into the
build.
At
last the insurance arrived today. However, as I'm very close to running the car I need to upgrade it to real insurance,
not just the off-road variety. I did a bit more admin by phoning the VRO and after failing--again--to contact the
chap there who does kit cars, one Mr Hill, I got the helpful person to send me the forms I need: a V55/5 to request
a registration number and a V627 which identifies, in a largely meaningless manner, the things that went into the
build.
Yesterday's picture of the instruments just had them pushed through the holes in the dash. Today I also installed all the lights and switches and wired everything up. I had thought this was going to be a fairly tricky job but as it happened it was quite simple. In this case the Westfield loom was just right. Everything was in the right place and just went together easily. I also installed the crash pad and tried it with the steering wheel and kick strips in place. It looks like this photo. Not bad really.
More importantly some testing indicated that everything worked properly. It was quite enthralling to see the instrument needles kicking slightly and rather magic "0.0" on the (LCD) odometer.
Lastly, as the fuel gauge indicated about 1/3 full, I turned on the fuel pump and watched the fuel regulator fill up. I can't see anything leaking but there was a very slight smell of petrol. I shall assume this was coming out of the carb inlets which seems quite feasible.
I really must try and run it this weekend. As a bit more preparation for this I tidied up some of the wiring in the nose cone, which I had had to mess up at the time of the great flood. I also started on torqueing up, again, all of the suspension. I still have this problem that I can't get my torque wrench up to 250 ft lbs for the rear hub nuts though. Perhaps the garage that I take it to for a pre-SVA pre-MOT will be able to do it?
September 25th
I'm afraid that I decided that the crash pad didn't cover up enough of the problems with the dash. In particular, it was difficult to hold it in position with the recommended technique: velcro. (I'm reminded of a story I heard once that there were never any rubber bushes, or any other rubber in the suspension, on a Rolls-Royce car as Royce--the engineer of the two--didn't consider rubber to be an engineering material. I can imagine what he would have thought of velcro.)
So, I took the dash out again, peeled back the vinyl covering, trimmed the aluminium underneath and stuck the vinyl back using Evostik. It was actually quite easy to do.
With any luck that's the last about this bit.
in case you've got to this frame directly and can't get out, go here.