 Having bought the correct grease I could put the rear wheel bearings in and
install the rear hubs. The Hammerited hubs don't look absolutely wonderful next to the powder coated de Dion tube,
but they're not bad.
Having bought the correct grease I could put the rear wheel bearings in and
install the rear hubs. The Hammerited hubs don't look absolutely wonderful next to the powder coated de Dion tube,
but they're not bad.
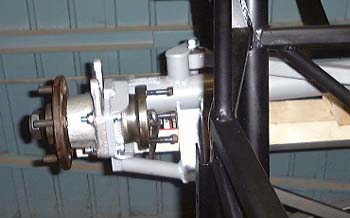
After that I installed the hubs in the de Dion tube and then installed the stub axles, making sure that I got the right and left hand threaded hub nuts the right way around.
After that I tried to install the driveshafts. At that point I realised the obvious, in that I should have left the hubs loose as that's the only way to get the driveshafts to fit. Still, it wasn't too difficult to loosen them a bit. Needless to say, they're a lot more difficult to adjust with the stub axles in place, but not impossble.
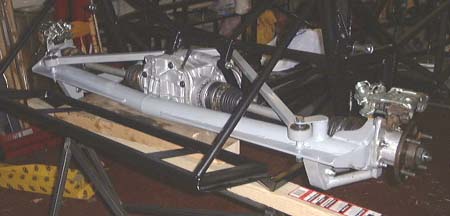 From there it was downhill for a while. I installed the trailing arms, bolted on the brake
calipers and, apart from the springs/dampers, that finishes the rear end. I can't put the springs in yet as:
From there it was downhill for a while. I installed the trailing arms, bolted on the brake
calipers and, apart from the springs/dampers, that finishes the rear end. I can't put the springs in yet as:
- The springs are in two rates, and there is no clue in the manual which goes which end.
- The diagram in the manual indicates that there is a sleeve to make the bolts fit the bottom of the damper bush, which I don't have.
- I need some spring compressors.
Apart of course from the handbrake cables, brake lines, etc., etc.
The next issue is what to do next. The build manual says to put the rear three quarter panels in, but as far as I can see that will block off the brakes lines slightly, unless there is some reason why it's easier to get the lines in the right place with panels in.
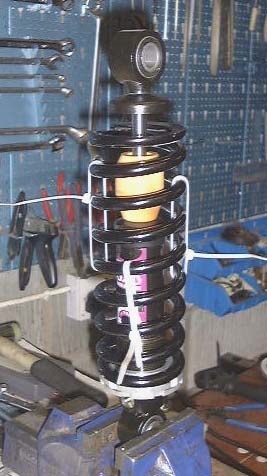 I've discovered that I don't actually need the spring compressors, as there's
very nearly enough play in the dampers to get the springs on anyway. I compressed the springs just very slightly
by hand and held them there with some tie-wraps (amazing things...). This compression (probably only about 5mm
was enough to get the spring base on the damper.
I've discovered that I don't actually need the spring compressors, as there's
very nearly enough play in the dampers to get the springs on anyway. I compressed the springs just very slightly
by hand and held them there with some tie-wraps (amazing things...). This compression (probably only about 5mm
was enough to get the spring base on the damper.
I phoned Dax and asked Peter Walker there which spring rate I should put on each end. The two rates are 375 and 300 (presumably lb/inch). Although the rear of the car uses a higher rate it actually uses the lower spring rate due to the different leverages exerted on the spring by the suspension.
The missing sleeves were actually hidden inside the damper boxes. Unlike the diagram in the manual they are actually "top hat" washers that go in each end of the prefitted bush in the damper.
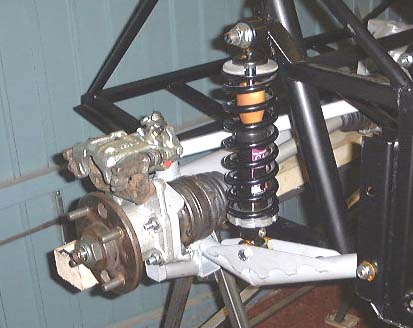 Having sorted out how to squash the spring, I mounted the springs on the car. This was
pretty easy, although the spring had to be assisted into the trailing arm by opening out the gap very slightly
with a (large) screwdriver.
Having sorted out how to squash the spring, I mounted the springs on the car. This was
pretty easy, although the spring had to be assisted into the trailing arm by opening out the gap very slightly
with a (large) screwdriver.
That's my lot for the night. However, I'm still musing about what to do next. There seems to be a strong argument for doing the three things that go from front to back of the car: fuel lines, brake lines and wiring loom. There's some real assistance in the Rush build diary that's on the Dax web site. The chap who buiilt that car definitely thinks that as much as possible should be done to the "inside" of the car before putting any more than is necessary on the "outside". This would probably mean doing all three of those issues next.
in case you've got to this frame directly and can't get out, go here.