 I desperately need to get some sidescreens as the car really isn't driveable
without a helmet at the moment. It would be a lot better if I was shorter and with shorter arms, but I'm not.
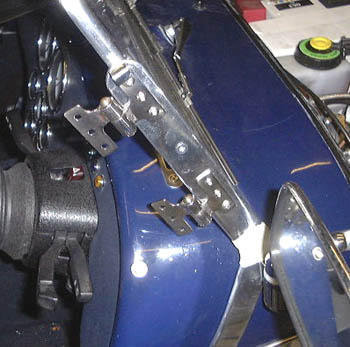
As I've said, I've decided not to get the Dax sidescreens (they call them doors which they clearly aren't) as they rather block off the side view. However, they are always a possible backstop. One thing that does seem to be sensible to get from Dax are the hinges, which Dax make from stainless.
I spent a while this evening mounting these on the windscreen supports, as you can see.
The next job will be to cut a piece of 4mm polycarbonate to make the top, see-through, part of the sidescreen. I bought the polycarbonate from a local plastics supplier. Its tradename is Lexan, and is produced by GE plastics. It certainly looks very transparent and seem to cut and file nicely.
I cut off a chunk of the corner this evening and checked that is it possible to bend it under the application of heat. The reason for checking this is that I suspect it will make the sidescreen firmer if a small return is bent into the top and rear of the see-through bit. I heated it with a heat gun and, after quite a long time, it bent nicely. The only issue is making sure that I bend it evenly, as I'll only get the one chance to do it without messing up the optical properties of the whole piece, I suspect.
I spent a while at the weekend looking into making the bottom part of the sidescreen out of GRP. This was a bit of a disaster, to be honest. This was mainly due to the difficulty of making a suitable mould. However, I have a couple of other ideas that might help, or I'll give in and make it out of aluminium.
 First job today was to look at the rear wheel arches. I have a problem in that
the tyres and arches are contacting rather a lot. This is a common Rush problem, but nonetheless annoying. The
problem really is that the manual gives absolutely no advice as to where to put the arches. Anyway, I took the
arches off and slotted the mounting holes so that they could go back on 5mm further back on the car. The problem
with this is that it exposes the mess at the rear corner of the kick strips, acquired as a result of having to
cut off the top of the side panels.
With it all back together Tom and I went for a drive. This was to Halfords as, annoyingly, one of the rear bulbs had blown which seems a rather short period. The conclusion was that the arches were better, but by no means fixed. I'll have to have another go...sigh....
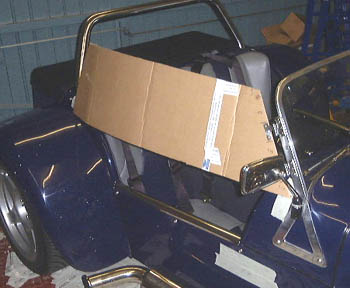
Getting back to the sidescreens and having got the hinges mounted I could theoretically cut out the polycarbonate. However, I want to make sure that it is really the right shape. So, I firstly cut out a cardboard template. This was largely done by sequential guessing, trimming it bit by bit, ending up with this floppy thing here.
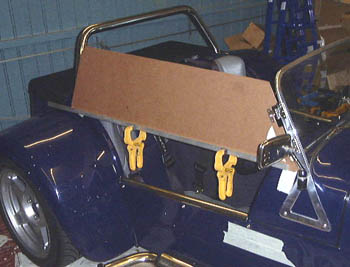 I then transferred this shape to a piece of hardboard and cut that out, this
time trying to make it fit a little more snugly around the hinges as I know from the Westfield that howling gales
and concentrated jets of water tend to creap in here. The photo here shows the hardboard template, with a piece
of aluminium clamped to the bottom to simulate the sort of stiffness that I hope will arise from whatever I do
at the bottom of the transparent bit.
When I next get back to this I'll have a long think about whether it's the right shape and then transfer it to
the polycarbonate which is covered with a translucent film that I think will be capable of being written on.
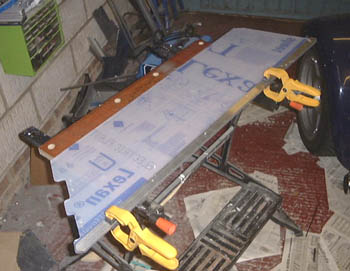 Having cut out the hardboard template, I transferred it to the Lexan and cut
it to shape using a collection of handsaws. It seems to cut quite easily, but seems to have blunted my saw now.
The original plan was to bend the top edge of the side slightly, so as to get a bit more longtitudinal rigidity.
However, experiments showed that it was rather difficult to do, due to the difficulty of evenly heating up something
that was this long, so I ended up with it just flat. It should in any case be fairly stiff as I plan on bolting
an aluminium stiffener to the bottom of the sheet, in the position that it is here in the photo.
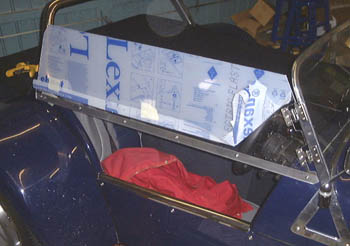 I bolted the aforesaid piece of aluminium to the Lexan and tried it on the car.
It looked pretty good, although I'm still trying to keep the protective films on the plastic so I can't really
see what it's like.
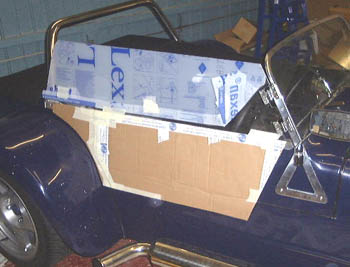 The next step was to work out the shape of the lower part of the screen. So,
I resorted to more cardboard templates and ended up with this. I then transferred this to hardboard. However, the
problem with this is that the bottom part of the sidescreen is distinctly 3D, in that I want it to bulge out so
that it provide a better elbow rest inside the car. So, I'm going to have to work out how to provide some sort
of template for that, and how to make it the required shape at all.
So, with more thought needed I retired to a safe distance.
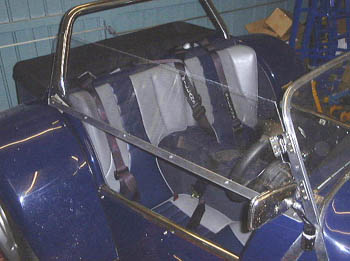 With the weekend arrived, and before I went on with the manufacture, I decided to try out
the screen as it exists so far. So, I stripped off the protective film and went for a drive round. Gratifyingly,
it worked rather well. I had been worried that it would flex too much but it seemed to be fine. What's more the
lower part should firm it up in any case.
So, I needed to work out what to do with the bit at the bottom. I had an email from a chap called Jonathan Lloyd, who from his email address is a student at Loughborough University. (Thanks Jonathan!) I assume it's still the case but Loughborough always used to be a hot-bed of engineering students and Jonathan recommended I look into using blue foam for a mould for the lower part of the screen. I had read about blue foam a while ago and had largely put it away in a dusty portion of my mind.
On re-reading about it it seems that blue foam is a sort of extruded (not expanded) polystyrene foam that is really intended as building insulation material. Oh, and it's blue, or sometimes pink. It seems to be an ideal material for making moulds apart from the minor (!) problem that polyester resin dissolves it! However, it seems that this can be avoided by using epoxy resin or, more interestingly, protecting the mould with packing tape!
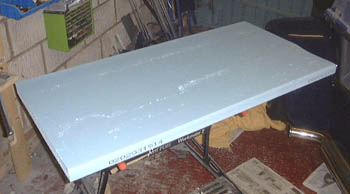 So, I decided to have a go. I phoned a local model shop (blue foam seems to be used a lot
for model aircraft airfoils). "Can't get it round here", he said. That seemed odd so I went round to
the local builders merchant. They had piles of Dow trademarked (as in the link above) blue floor insulation foam.
So, I bought a couple of sheets and took it home.
I decided to try a test first so I cut off a small corner and shaped it with a Surform into a convex-y shape, the
rationale being that it was a bit like a mini sidecreen.
 Once that was smoothed up with glass paper (and the obvious problem with blue
foam was that the rest of the house was turning blue at this point due to the dust) I sealed it up with some parcel
tape and put a couple of coats of PVA release agent onto it.
I then put on a layer of gel coat, waited a while and put some GRP proper on top of that.
Then I waited a day and was rewarded the following day with a moulding that actually came off the mould and had the desired shape. Miraculously the tape had protected the mould. It was interesting to note that some splashes of resin had crept around the back of the mould and had indeed dissolved some spots in the mould.
So, flushed with that success I decided to have a go at the whole thing, although obviously making a moulding that's about a metre long is rather different from one that's about 200mm long...
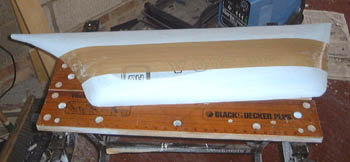 Using the hardboard template I made a couple of days ago I cut a chunk of foam to the right
plan shape and set about it with a Surform again. After several hours of hacking away (and a lot of blue
dust) I ended up with something that was the shape I wanted, or at least I think it is.
I then coated it in packing tape (while I was doing it think that it probably wouldn't work so well on a large
moulding) and eventually ended up with a completely covered mould....
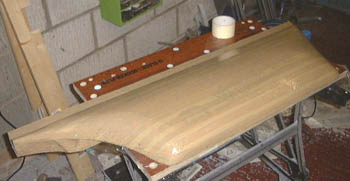 ...which looked
like this. This was put the same process of covering with release agent. (I wanted to be using wax for this but
the people I bought the GRP stuff from, and paid for next day delivery, have decided not to deliver my stuff.)
 I then put some gel coat on it and followed it up with a lot of glass and resin.
I am aiming for a moulding that is quite dense. It should end up, assuming the calculations are correct, at about
1200 grams per square metre and about 3.5mm thick.
I then need to leave this for a while. But, while it's going off there all sorts of problems appearing in my mind.
They include: the mould's been attacked by the resin, there's too much air in the GRP, I'll never get the mould
off, it'll be the wrong shape anyway. Still if nothing else it's been an interesting experience. In the next day
or so I'll try and separate it from the mould...
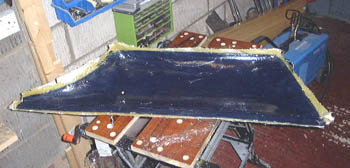 Having let the moulding sit a while I decided to have a got at getting it off
the mould, with some trepidation. After a certain amount of pushing and shoving it came free fairly easily. One
obvious problem with using PVA as a release agent is clearly that it's actually a glue (it's the major constituent
of a lot of wood glues) and it actually seems to stick the mould and moulding together. It was clearly visible
as a thin film on the moulding inner surface, a bit like cling film.
The resultant moulding is pretty firm (actually very firm, it might actually be too thick and strong).
I now have to decide what to do with it. Clearly I need to get rid of all those sharp bits around the edge but after that I could either polish up the gel-coat inside the moulding and use it as a female mould (as opposed to the male mould that I made out of blue foam) or use this moulding as-is. The advantage of the former is that I get could a nicer finish on the outside of the mould, at the cost of a lot of elbow grease, and the final moulding would be exactly the shape of the original template. As it is it's a bit oversize due to the build up of GRP on the top of the correctly-sized blue foam mould. The advantage of the latter is, of course, less work as I just use it as it is.
I think what I'll do for now is to cut this current moulding down to the correct size and just see how it is against the car. After that I'll decide whether to go for using it as a female mould or not.
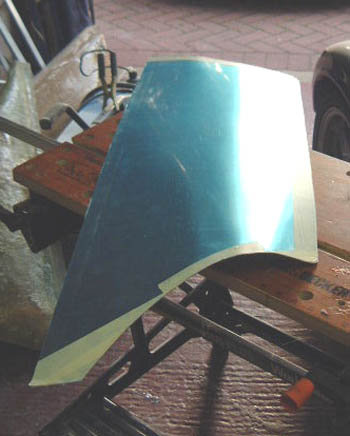 I spent a bit of time during the week cleaning up the moulding. However, I got
to thinking that it wasn't quite the right shape I wanted; I'd really not chiselled away at the blue foam for long
enough. As this whole thing is getting in the way of actually driving the car I decided to go back to plan A (or
it is H?) and make something out of aluminium. Depending on how this goes I might actually go back to the GRP later,
but hopefully I'll be able to drive the car without a skid lid for a while anyway.
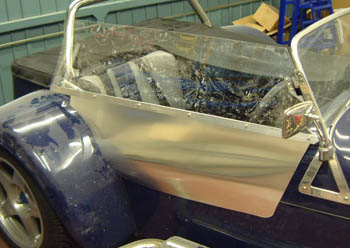 So, I got out my template again and cut a chunk of ally to the right size and
leaned on it to create the desired bend to provide an "elbow hole".
I then bolted it to the bottom of the Lexan and worked out what shape another piece of aluminium would have to be to fill in the space between the bent piece and the bodywork. This was done by using a piece of cardboard as a template and cutting it slowly to the desired shape.
In this form it actually looked quite good on the car, almost to the point that I thought I wouldn't bother covering it.
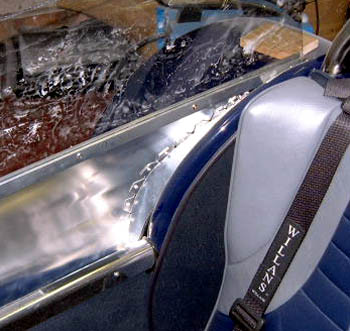 I cut this extra piece out, giving it a lot of "ears" for rivetting
to the side proper and rivetted it all together.
This all seemed to work rather well. I finished it off by fitting some sealing trim around the edge which appeared to seal everything off nicely.
In that form I went out for a short drive round. It seemed fine, except that the whole thing swung open on left hand bends. So, I needed to make some sort of fitting to hold the screen closed.
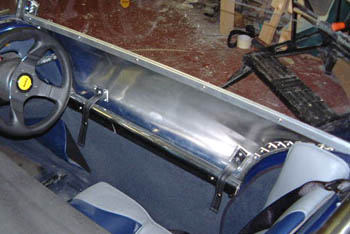 I did this, in a way analogous to the Westfield sidescreens, by using some of
the leathercloth that I'm intending to cover the outside with. I cut and sewed some bits of this into a couple
of straps and attached these to the sidecreen with rivets. I attached a coupe of little bits of aluminium to the
sidescreen to strengthen it a bit in the places where the straps attached. Then, with a couple of pop-fasteners,
I made some fittings for attaching the straps to the inside of the car.
That seems to hold everything pretty firmly, and it is possible to do it up when sitting in the car.
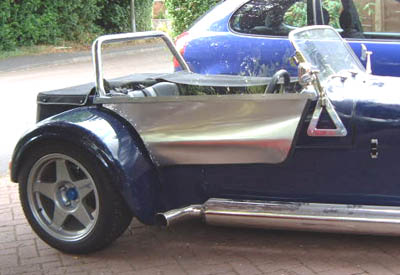 So, finally as it was a nice evening, I went out for a blat. There obviously
needs to be another sidescreen but with just this one things were much, much, better. In fact, it was almost cosy
in the car. Perhaps the best feature is that the loose bits on the bottoms of the shoulder straps don't whack you
in the face any more; a great feature.
So, now I need to make another one, as well as covering this one. Although the aluminium looks pretty good at the
moment it doesn't really go with the car...
 Finally, I got around to covering the sidescreen. Unfortunately, I had to leave
one of the stiffening struts exposed as the leathercloth I was using would have been too baggy without it. I also
need to find some nut covers to clean up the exposed nuts a bit. But apart from that this is now done. (Unless
I decide to cover the inside as well.)
I'm very pleased with what this looks like and how it works, now I need to make the other one. Hopefully this will
be like things usually are on cars in that the second time something is done it seems a lot easier and quicker
to carry out.
Nothing much to say today, as I spent a lot of the weekend help Dave with his bodywork. I did manage to cut out the Lexan for the top part of the left hand sidescreen and attach the hinges to it. With luck I'll get the rest of the sidescreen made this week.
in case you've got to this frame directly and can't get out, go here.