 Hopefully, hence this new page, this is now the start of getting the engine
back in again. It's the Stoneleigh KitCar show in a couple of weeks and it would be nice to get the Dax there.
However, I've just realised that there ought to be an MOT and so on due before then too.
Hopefully, hence this new page, this is now the start of getting the engine
back in again. It's the Stoneleigh KitCar show in a couple of weeks and it would be nice to get the Dax there.
However, I've just realised that there ought to be an MOT and so on due before then too.
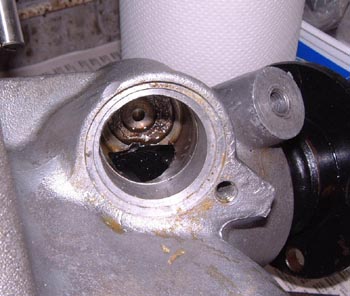
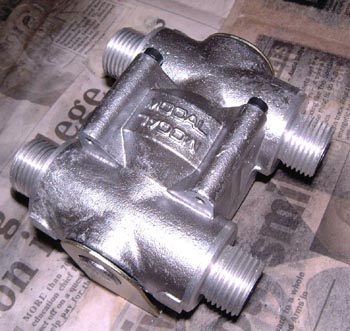
First thing was to finally bung up the leak in the gearbox, which as I said earlier seems to be coming from the unused speedo drive connection. This is a simple hole really, with a flange on the edge. Last time I cut a aluminium disc to the right size and gummed up the edges with metal/metal sealant and clamped it in, but it obviously.
 This time I wanted to do something better so I cut a gasket out of the old inlet
manifold/valley gasket, a disc of alumium and made an aluminium clamp lever. This was all assembled so that it
looked like this.
This time I wanted to do something better so I cut a gasket out of the old inlet
manifold/valley gasket, a disc of alumium and made an aluminium clamp lever. This was all assembled so that it
looked like this.
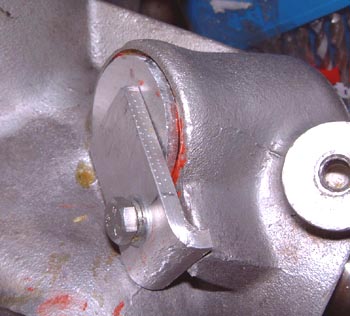
 However, I needed to be sure. So, I up-ended the gearbox and left it like this
for a while.
However, I needed to be sure. So, I up-ended the gearbox and left it like this
for a while.
Unlike previous attempts, and when the gearbox was first out of the car, I left this for a couple of hours without any obvious oil leak.
So, hopefully that's a success and I can get on with other things.
 The first of these is just to clean up the chassis, especially from the gearbox
oil which is places is very unpleasantly clagged up. So, I set about the chassis and so on and, using some petrol
to dissolve away the muck, I worked my way from the engine compartment backwards cleaning away. (Of course, all
the grot is now on the floor of the garage.
The first of these is just to clean up the chassis, especially from the gearbox
oil which is places is very unpleasantly clagged up. So, I set about the chassis and so on and, using some petrol
to dissolve away the muck, I worked my way from the engine compartment backwards cleaning away. (Of course, all
the grot is now on the floor of the garage.
When I was cleaning up under the driver's seat, I noticed that there was an area of gelcoat on the seat that had cracked quite badly, presumably as a consequence of the seat grounding that's happened a couple of times. I think I might try and strengthen this up with some GRP over the next couple of days.
 However, apart from the problem everything came up clean again. If I'be managed to fix
the gearbox oil leak, and it seems likely that this is the case, then I've sorted a fairly major problem as it
was a pain getting oil inside the car all the time.
However, apart from the problem everything came up clean again. If I'be managed to fix
the gearbox oil leak, and it seems likely that this is the case, then I've sorted a fairly major problem as it
was a pain getting oil inside the car all the time.
When I put the tunnel back, I'll certainly also make an attempt to seal the tunnel a bit better with the aid of some closed cell foam too. Perhaps if I stuck that to the tunnel itself, it would allow for better positioning of the foam.
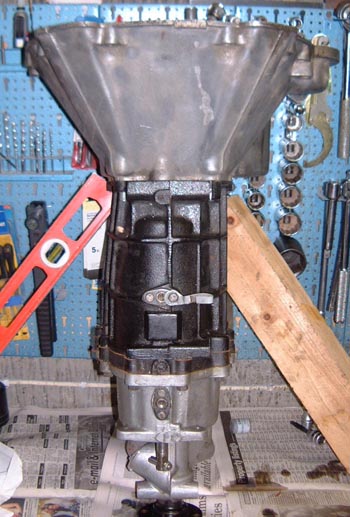
 I started refitting the engine and gearbox together. This was, as it was last
time, a real fiddle and I ended up lifting the gearbox with the hoist and pushing it into the engine. Even so it
was not fitting easily and I started using the bell housing bolts to pull it all together. Unfortunately, there
was then a snapping noise and the clutch release pin dropped on the floor, followed by the little nylon clip that
holds it into the release fork.
I started refitting the engine and gearbox together. This was, as it was last
time, a real fiddle and I ended up lifting the gearbox with the hoist and pushing it into the engine. Even so it
was not fitting easily and I started using the bell housing bolts to pull it all together. Unfortunately, there
was then a snapping noise and the clutch release pin dropped on the floor, followed by the little nylon clip that
holds it into the release fork.
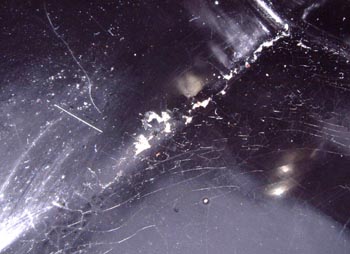
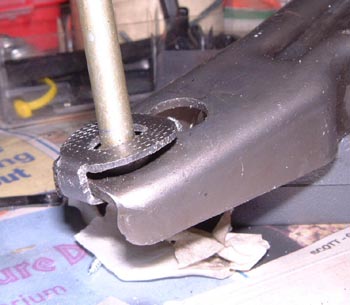
You can see the two pieces that it ended up in here. Bear in mind that the thing is only about 15mm across anyway.
So, that's a real bugger, and due to my stupidity. Tomorrow I'll see if I can get a new one from the local Rover dealers. (What's the betting that I either can't, or I can but only by buying half the clutch?) If I can't get one easily, I might have to try fabricating something. It doesn't actually take any load, just holding the release pin roughly in location until the slave cylinder shoves on it. However, I'd have to be absolutely certain that a fabricated part was going to stay together, as getting at it would possibly involve taking the engine out again...
 I had a try at getting a new clip from the local Rover dealers. In fact I've
ordered one but as it won't be here for a few days I need to get on. Hence I made something out of a bit of mild
steel. Luckily it doesn't take any load and I think that if it falls to pieces I'll be able to fit a real
one on without taking the engine out, at least with a bit of ingenuity.
I had a try at getting a new clip from the local Rover dealers. In fact I've
ordered one but as it won't be here for a few days I need to get on. Hence I made something out of a bit of mild
steel. Luckily it doesn't take any load and I think that if it falls to pieces I'll be able to fit a real
one on without taking the engine out, at least with a bit of ingenuity.
With that done I could put the engine and gearbox together, which was much easier to do this time, probably because the clutch release pin wasn't catching on something. Presumably this is why I managed to break the real thing.
After that I could refit the engine. That was the usual long-drawn out process of inching the engine in, but eventually it was there. Getting the engine mounts done up was a bit tricky due to the lack of access, but feasible eventually.
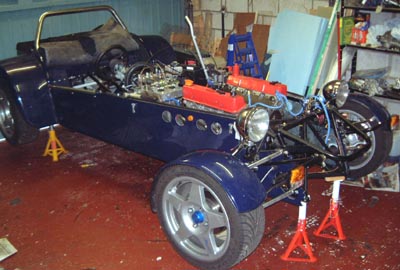 I then pushed the car back into the garage (it'd been half sticking out of the
garage to get easy access for the engine hoist) and put it back onto stands, where things had started a while ago.
I then pushed the car back into the garage (it'd been half sticking out of the
garage to get easy access for the engine hoist) and put it back onto stands, where things had started a while ago.
I could then set about all the fiddly things that were needed to get the engine going again, such as reconnecting the propshaft and refitting the oil filter.
However, the big thing to do is to fit the oil cooler, as one of the things that I want to do is to sort out the oil system for once and all.
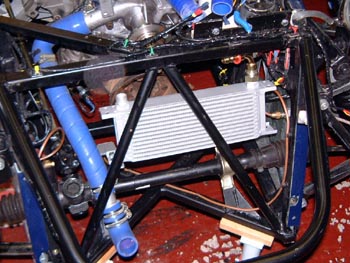
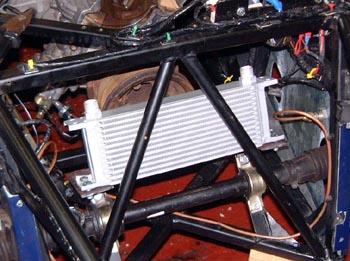 There's not a huge number of obvious places to mount the cooler,
and I settled for putting it directly behind the radiator. It's apparently best to have the two radiators close
up to each other, so as not to get a dead spot in the air flow around them. In order to mount the cooler here I
made up some brackets to mount it off the upper steering rack mounting bolts. When in position it looks like this
photo.
There's not a huge number of obvious places to mount the cooler,
and I settled for putting it directly behind the radiator. It's apparently best to have the two radiators close
up to each other, so as not to get a dead spot in the air flow around them. In order to mount the cooler here I
made up some brackets to mount it off the upper steering rack mounting bolts. When in position it looks like this
photo.
 I've also to find somewhere to put the oilstat. This is a sort of thermostat
for oil coolers that means the oil cooler doesn't do much before the oil gets to 80°. However, that means more
pipework of course, which isn't exactly fun at the front of this car. I found a place for mounting this on one
of the cooler mounts, but it'll be a real fiddle getting all the pipes in.
I've also to find somewhere to put the oilstat. This is a sort of thermostat
for oil coolers that means the oil cooler doesn't do much before the oil gets to 80°. However, that means more
pipework of course, which isn't exactly fun at the front of this car. I found a place for mounting this on one
of the cooler mounts, but it'll be a real fiddle getting all the pipes in.
Finally, after a very long day, I Hammerited the cooler mounts.
With luck I'll be able to all this done before the coming weekend as it would be nice to be able to drive the car to the kit car show at Stoneleigh.
 Duuuh... I realised that the oil cooler positioning was exactly where the radiator
bottom hose needed to go. So, I modified the mountings to move it towards the left of the car a bit.
Duuuh... I realised that the oil cooler positioning was exactly where the radiator
bottom hose needed to go. So, I modified the mountings to move it towards the left of the car a bit.
I also arranged for the oilstat to bolt onto the rear of the right hand mount where it should be moderately easy to connect up.
However, I also arranged an MOT today for this coming Friday (May 2nd). As I'm going to struggle to get the car together properly for then, I decided to forget about the oil cooler for a while and concentrate on getting rest of the car together.
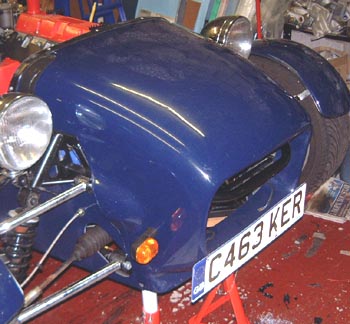 So, I made a big list of things to do and set about it. The first item was really something
that I'm doing as I have the front of the car in pieces. While I was looking at the front of the car the SVA lighting
bars sort of fell off. I replaced the indicators with these small ones (they're actually motorbike ones) attached
to the side of the nosecone.
So, I made a big list of things to do and set about it. The first item was really something
that I'm doing as I have the front of the car in pieces. While I was looking at the front of the car the SVA lighting
bars sort of fell off. I replaced the indicators with these small ones (they're actually motorbike ones) attached
to the side of the nosecone.
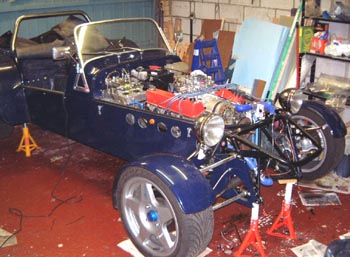 After that I got stuck into just putting the car back together. I:
- reattached the gearbox remote. Although after testing things the reverse light wasn't working anymore. I know the microswitch in the remote is a soft spot and, to make matters worse, I adjusted it and managed to break it. So, for the MOT at least I'm going to have to remove the reversing light and just not have one!
- Made oil connections to the filter, missing out the cooler for now.
- Filled the engine with oil and spun the oil pump with the primiing tool until oil started appearing at the top of the engine. Stupidly, I then had to clean up the mess caused by not having the oil gauge on the end of the oil pressure gauge capillary....
- Re-fitted the transmission tunnel covers.
- Re-fitted the scuttle and the various water connections.
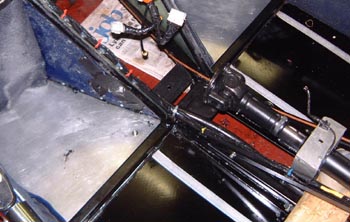
- Re-fitted the dashboard and all the column switches.
- Re-fitted the starter motor.
- Re-fitted the clutch slave cylinder.
- Re-fitted the distributor. This is really tricky as the plug leads have to be set up correctly, and the oil pump drive, so that the cylinder timing is set right.
- Installed the spark plugs and re-fitted the plug leads.
- Set the static timing to 6° BTDC.
After all this, it looks much more like a car again. After re-fitting the radiator and exhausts it might even go again!
in case you've got to this frame directly and can't get out, go here.