Well, with the car back I've been getting it back together again, although it's obvously a rather long job.
 One thing that the chaps at the Kit Car Workshop mentioned was that Mark Fisher
is now making a brake pedal with a longer balance bar tube in the middle of it. This would allow the brake bias
adjuster to be a bit more laterally stable so I phoned Mark and asked him to send me one. Until then, I've taken
the brake pedal out and cleaned up the balance bar assembly for refitting.
One thing that the chaps at the Kit Car Workshop mentioned was that Mark Fisher
is now making a brake pedal with a longer balance bar tube in the middle of it. This would allow the brake bias
adjuster to be a bit more laterally stable so I phoned Mark and asked him to send me one. Until then, I've taken
the brake pedal out and cleaned up the balance bar assembly for refitting.
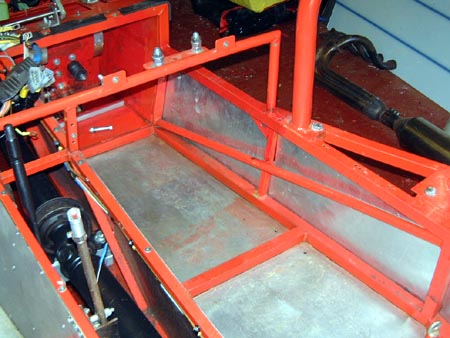
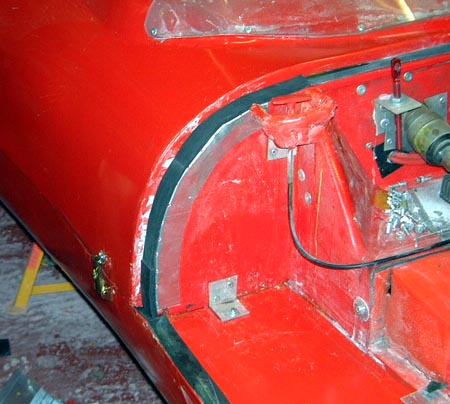
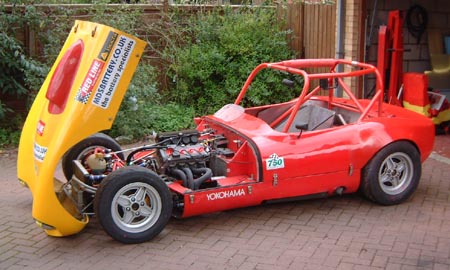
I also refitted the chassis panel that I removed before sending the chassis away, as you can see in the photo. (If you look hard at the top left you can just about see the absence of a brake pedal; that black bit is the boot around one of the master cylinders.
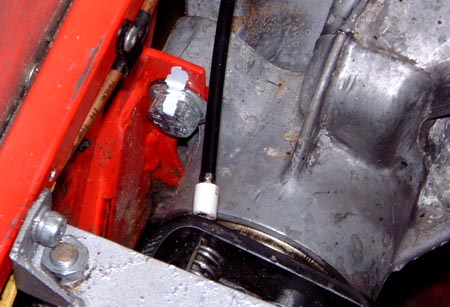 As I mentioned, the diff bolts are apparently loose and I had a good look at things. Worryingly
(very) out of 6 M10 bolts that secure the diff, 2 of them were missing and the other 4 were all loose! So, I refitted
the two missing ones, with plenty of threadlock, and retighted the others. What's more, I went round all six of
them marking them with white paint so that I can see if the bolts move. I think I shall have to have a frequent
look at them as it's hard to see why they aren't just going to move again.
As I mentioned, the diff bolts are apparently loose and I had a good look at things. Worryingly
(very) out of 6 M10 bolts that secure the diff, 2 of them were missing and the other 4 were all loose! So, I refitted
the two missing ones, with plenty of threadlock, and retighted the others. What's more, I went round all six of
them marking them with white paint so that I can see if the bolts move. I think I shall have to have a frequent
look at them as it's hard to see why they aren't just going to move again.
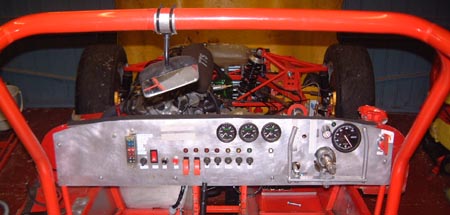 I then spent a frustratingly long time reinstating the dashboard, scuttle and
gearchange. Fitting the gearchange is quite tricky and I kept doing everything in the wrong order. Still, I eventually
got it back. Everything here's actually better than it was before as I took the opportunity of having the scuttle
off to tidy up some of the wiring that was added after I built the car originally. In particular some of the wiring
for the data logger wasn't as neat as it could have been.
I then spent a frustratingly long time reinstating the dashboard, scuttle and
gearchange. Fitting the gearchange is quite tricky and I kept doing everything in the wrong order. Still, I eventually
got it back. Everything here's actually better than it was before as I took the opportunity of having the scuttle
off to tidy up some of the wiring that was added after I built the car originally. In particular some of the wiring
for the data logger wasn't as neat as it could have been.
The dash got pretty bent in the accident and it hasn't really escaped unharmed. However, it's mostly OK. I did wonder about making a new one but managed to stop myself.
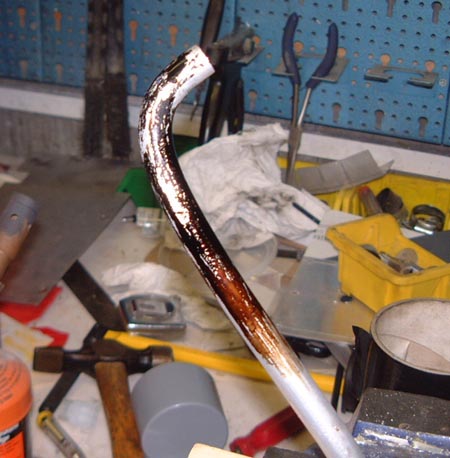 As part of refitting the gearchange I did something I've been meaning to do
for a while which is to anneal the lower rod which I had to bend a lot to connect up. As a consequence I am a bit
wary that I've introduced all sorts of cracks into it. I was told that by annealing it I would help it to stay
not cracked. Essentially, all you do is to heat it up and let it cool slowly. Apparently with aluminium the temperature
is indicated by coating the material in soap first and heating it until the soap goes black.
As part of refitting the gearchange I did something I've been meaning to do
for a while which is to anneal the lower rod which I had to bend a lot to connect up. As a consequence I am a bit
wary that I've introduced all sorts of cracks into it. I was told that by annealing it I would help it to stay
not cracked. Essentially, all you do is to heat it up and let it cool slowly. Apparently with aluminium the temperature
is indicated by coating the material in soap first and heating it until the soap goes black.
Thanks to John who told me this, and certainly the soap does go black eventually, as seen here. I mentioned this all to Tom, commenting that I'd never understood the issues about heat treatment of metals and he starting chuntering on about crystal size and crack propagation. Serves me right to encouraging him to take an Engineering degree I suppose...
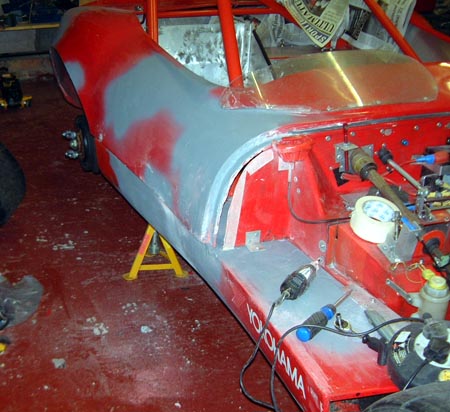 I then turned to refitting the bodywork. I still need to do rather a lot of filling and
rubbing down but I think this'll be easier to do with the bodywork back on the car. This time I refitted this sidepod
using rivnuts and bolts, as a couple of times I've wanted to take it off (to get at the brake bias adjuster cable)
and it isn't easy to do when it's rivetted in. It took while to do, mainly because the sidepod is less flexible
than it used to be because of the quantity of GRP that it's acquired. Eventually, though, it was on and I tried
the main tub on too.
I then turned to refitting the bodywork. I still need to do rather a lot of filling and
rubbing down but I think this'll be easier to do with the bodywork back on the car. This time I refitted this sidepod
using rivnuts and bolts, as a couple of times I've wanted to take it off (to get at the brake bias adjuster cable)
and it isn't easy to do when it's rivetted in. It took while to do, mainly because the sidepod is less flexible
than it used to be because of the quantity of GRP that it's acquired. Eventually, though, it was on and I tried
the main tub on too.
However, I need to clean all of this up rather more, and also remake the aluminium plate that goes at the front of the tub and hooks around the scuttle.
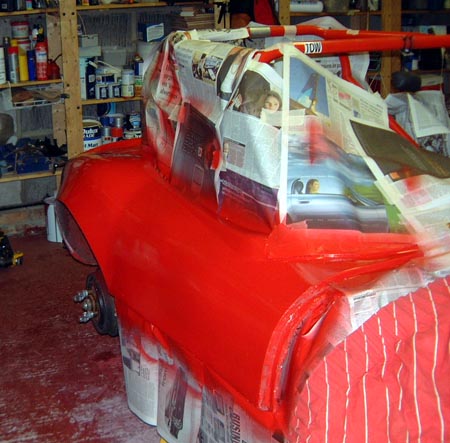
 Clearly, I need to paint it as well. The paint I ordered arrived and I tried it on another
part of the tub which had also had primer on it. It isn't a completely wonderful match and I might try and get
something else. However, it will do if I don't manage to get something.
Clearly, I need to paint it as well. The paint I ordered arrived and I tried it on another
part of the tub which had also had primer on it. It isn't a completely wonderful match and I might try and get
something else. However, it will do if I don't manage to get something.
This photo shows the result of painting the top rear of the tub which was bashed up as a result of the original Mallory accident. I've taken the opportunity to clean this up to and there was a good deal of primer here too.
I need to get some colour advice from the rest of the family before I decide what to do about this. I'll see what they say...
No photos today as it all looks pretty much the same.
After looking at the painting even I came to the conclusion that it didn't look the right colour. In fact, the "Flame Red" paint is almost more orange than red. So, I took a chunk of gelcoat, strangely enough I've got lots, around to DAP to see what they had. We spent ages looking through colour charts until we came to a Renault red which seemed pretty good. So, I bought a can of that (they make it up there and then by adding pigments to a base-coloured aerosol) and tried it this evening. It looks, at least in the garage light, to be a rather better match. So, I'll probably have to buy a few more cans. I keep thinking that really I ought to buy some paint and a compressor and a spray gun really.
I also did what I think is the last bit of filling (at least I hope so). Once that's rubbed down with a few thousand sheets of wet-and-dry I can declare the bodywork ready for proper painting.
 I set about the bodywork with some wet-and-dry for what I hope is the last time. The finish
is really nothing to write home about, but hopefully it's OK for a race car.
I set about the bodywork with some wet-and-dry for what I hope is the last time. The finish
is really nothing to write home about, but hopefully it's OK for a race car.
Once that was done I painted the sidepod with the Renault colour that I got yesterday and this is the end result. If you look hard then even on this crappy photo you can see the grotty surface. I will have to hope that this won't matter, as the sidepod is actually quite hard to see too well when it's on the car.
The colour does seem to match OK. The Yokohama logo was actually masked off while I sprayed this so the red bits around that are the original colour. I can hardly see the difference, but then I'm no standard for such things really.
Whatever, I shall get a couple more cans of this red soon for doing the rear tub with. As long as I get a lot of stickers hopefully it'll all look fine. I did toy about getting some cellulose and a spray gun and a compressor but decided that aerosols would do for now. However, a friend has offered me a good deal on his old compressor which might be hard to resist anyway.
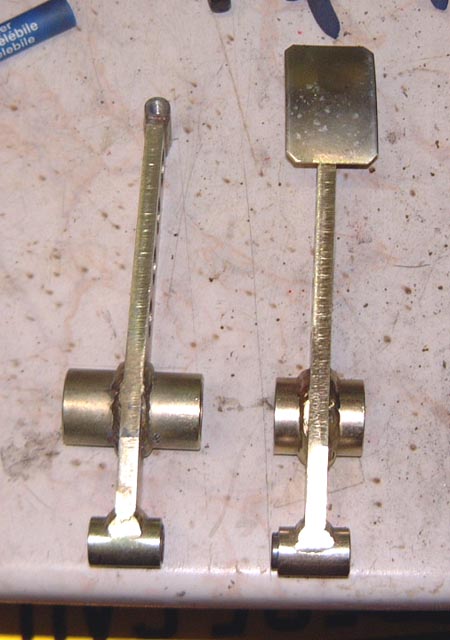 The brake pedal that I spoke to Mark Fisher about arrived today and you can see here how
different in size the tube is on this new one. This certainly looks as though it will stop the bias adjuster flopping
about and I set about installing all this in the car. I actually remade the connection from the bias adjuster cable
to the adjuster rod as it was really taking up a bit too much of the rod.
The brake pedal that I spoke to Mark Fisher about arrived today and you can see here how
different in size the tube is on this new one. This certainly looks as though it will stop the bias adjuster flopping
about and I set about installing all this in the car. I actually remade the connection from the bias adjuster cable
to the adjuster rod as it was really taking up a bit too much of the rod.
That's good as it means that I could stop the car again if I wanted to.
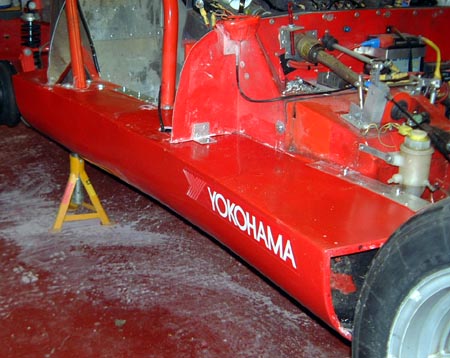 Finally, for today, I attached the newly painted sidepod to the car, having
threaded the newly fitted bias adjuster cable through it.
Finally, for today, I attached the newly painted sidepod to the car, having
threaded the newly fitted bias adjuster cable through it.
This is rather nice as it feels as though the car is actually coming back together properly. Hopefully I will have a good deal of time to work on the car this weekend and I should get it back to the sort of state that it was in before the accident at Mallory.
Then I can get on with the things I need to do before the race at Brands...
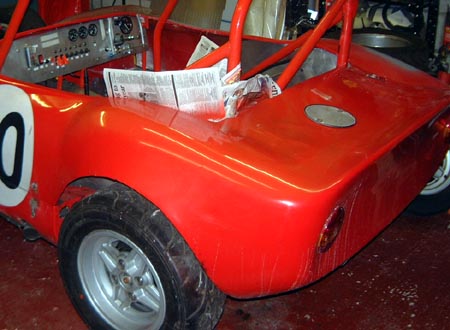
 So, on with the painting. This time it was the turn of the rear bodywork after a lot more
rubbing down, priming and painting it looked like this.
So, on with the painting. This time it was the turn of the rear bodywork after a lot more
rubbing down, priming and painting it looked like this.
One problem with this is something that's blown up after the race at Mallory Park. Apparently a couple of cars there were taking the piss slightly and the end result is that it has been realised that the Fury bodywork doesn't really comply with the part of the blue book (the MSA's book of rules) that describes what a closed wheel car is. The upshot of this is that we are all going to have to fit some sort of wheel spats. Apparently we are going to be let off the issue at the next race but after that things will get serious. The problem is that whatever I do it's bound to mess up this bodywork some more. In fact, it's increasingly obvious that the whole stuff will just carry on degrading, and being patched up and getting heavier in the process, until I buy some new stuff. Ho hum...
I've been looking at doing some more testing and assuming I don't bottle out tomorrow I'm going to book to go to Brands next week. There's another test day on the day before the race meeting there but that doesn't really leave time for fixing the car if necessary. (Mind you, if it does need fixing I might just throw my toys out of the pram in a big way.)
 Well, I did book the test at Brands so I just have to get the car going again
by Wednesday. So, I probably need to spent all weekend in the garage.
Well, I did book the test at Brands so I just have to get the car going again
by Wednesday. So, I probably need to spent all weekend in the garage.
First thing was to fabricate a new clip for the front of the rear bodywork to hook it around the scuttle. The earlier one was lost in the crash and, in any case, the bit of bodywork it was rivetted to disappeared to so I needed to do this all again. Still, no big deal and I cut out a bit of aluminium and attached it to look like the photo.
Once this was done, I reattached a number of clips to the side of the bodywork. None of these survived the crash and I had bought some replacements from Demon Tweeks.
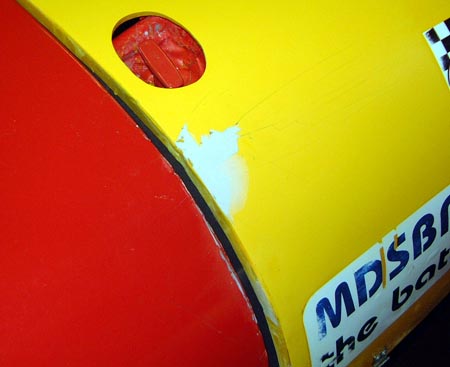 Next thing was a little of patching up on the bonnet. This also suffered in the crash,
although not to a huge extent. The biggest problem was a large chunk of gel knocked out which I filled as shown
here.
Next thing was a little of patching up on the bonnet. This also suffered in the crash,
although not to a huge extent. The biggest problem was a large chunk of gel knocked out which I filled as shown
here.
I had bought some paint for this but on trying it it turned out to be completely the wrong colour. So, I rubbed it al off again. I'll have to either find something better or just carefully position the sticker that goes with the extinguisher release.
 Attention then turned to the engine. I refilled with oil and water which I'd taken out
as I had to take the temperature senders out to take the dash off. I went through the usual business of spinning
the engine on the starter to make sure that there was some oil pressure, which there was.
Attention then turned to the engine. I refilled with oil and water which I'd taken out
as I had to take the temperature senders out to take the dash off. I went through the usual business of spinning
the engine on the starter to make sure that there was some oil pressure, which there was.
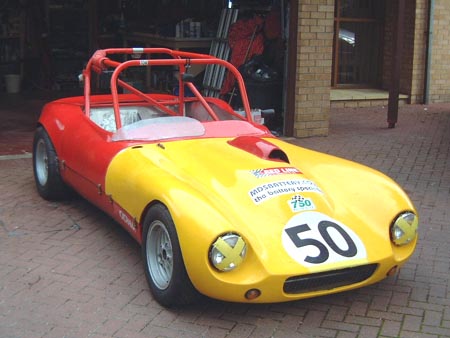
I then took the car off the stands and pushed it out onto the drive! It looks rather more like a car again now so that was very satisfying.
I must admit, another session of weeks in the garage might just kill my enthusiasm for this. Patching bent bits of bodywork together is not my idea of fun.
 With the car out, and the plugs back in, I turned on the various switches and started it.
Well it went whirr, whirr but nothing else happened. Hmm, I worried about this for a while as it's always possible
that I've disturbed something in the electrics. I was feeling a bit dispirited about tracing it and I just tried
the engine again. This time it started straight away.
With the car out, and the plugs back in, I turned on the various switches and started it.
Well it went whirr, whirr but nothing else happened. Hmm, I worried about this for a while as it's always possible
that I've disturbed something in the electrics. I was feeling a bit dispirited about tracing it and I just tried
the engine again. This time it started straight away.
Phew!
I ran the engine until the temperatures starting getting up to where they should be.
So, it was back into the garage and a rest, to be honest. I did go back later though and had a go at adjusting the reversing unit. It certainly seems as though bolting the diff in properly has changed the position of things in this area as I had to lift the unit a good deal to even make it possible to get the drive gears to mesh. Tomorrow I'll see if it actually works any better.
First thing today was to check out the reversing unit. And, wonder of wonders, it all worked fine again. I guess actually attaching the diff to the chassis properly had a profound effect. I found I could quite easily reverse all the way up the drive and into the garage without any untoward noises at all; that is, it sounded just like a milk float.
 At least now I'm starting to get onto smaller things, and indeed optional things.
First of these was to reattach the brake bias adjuster. When doing this I realised that the mounting bracket for this was actually bent. It's just rivetted to the top of the sidepod so I guess that's not surprising, but makes me realise just how close to me the effects of the crash were.
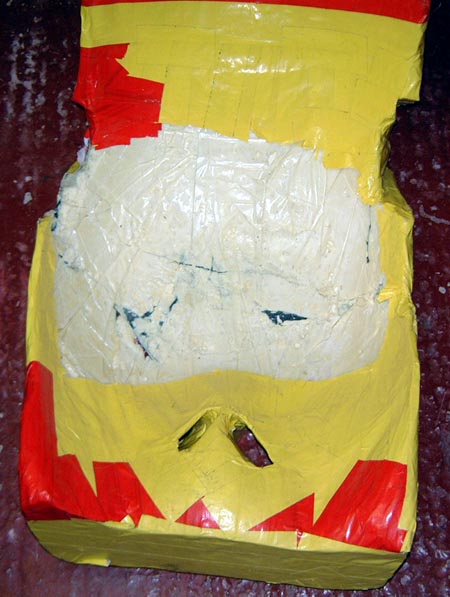
Next up was the seat. I actually had to break this to get it out of the bent chassis. The original intention was to remake it but as the damage was actually fairly minor I was wondering if I could just repair it.
The problem really is that the bottom of the seat is very thin and this was the part that had broken, you can see the breaks on the photo here after I'd pulled off some of the tank tape covering.
 So, all I did was to put the whole thing into another very large bin bag, put it into the car, make
up a small amount of foam and sit on it. I was hoping that the foam would just stick together the broken bits (it
is spectaclarly sticky stuff).
So, all I did was to put the whole thing into another very large bin bag, put it into the car, make
up a small amount of foam and sit on it. I was hoping that the foam would just stick together the broken bits (it
is spectaclarly sticky stuff).
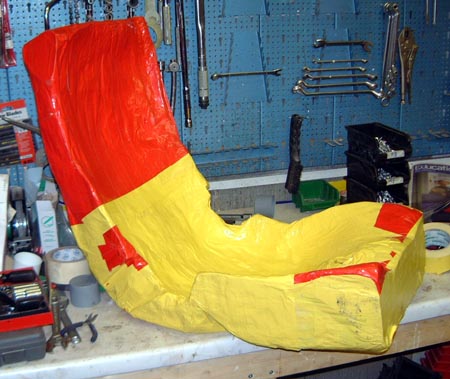
It turned out pretty successfully and after yet more tank tape had been applied it looked like this and seems pretty much exactly the same in the car.
One modification I did was to increase the size of the hole through which the crotch straps go. This should make the straps a little easier to adjust.
 After that it was really into tidying up things. I cleaned the car, polished
it (which is just a good way of getting rubber marks off the bodywork) and reapplied some of the stickers; most
importantly some new race numbers. I still need to replace some of the sponsorship stickers but I can get a new
lot of those at the next race.
After that it was really into tidying up things. I cleaned the car, polished
it (which is just a good way of getting rubber marks off the bodywork) and reapplied some of the stickers; most
importantly some new race numbers. I still need to replace some of the sponsorship stickers but I can get a new
lot of those at the next race.
The car actually looks pretty purposeful again which is quite a relief. I have to admit that I get a lot of pleasure from building cars; but very little from fixing them once they're broken. Hopefully I won't have to do this again for a while.