 Some people have emailed me about issues above. One thing is that apparently some bikers
fit a manual cam chain tensioner because of worries that the spring loaded one will not work properly. That's good,
as it means that I can easily get one of those if needed. Also, I spoke to the chap who make the sprocket adapter
and he says he can get me a spacer if needed (really a thick washer, I suspect). Again, good.
Some people have emailed me about issues above. One thing is that apparently some bikers
fit a manual cam chain tensioner because of worries that the spring loaded one will not work properly. That's good,
as it means that I can easily get one of those if needed. Also, I spoke to the chap who make the sprocket adapter
and he says he can get me a spacer if needed (really a thick washer, I suspect). Again, good.
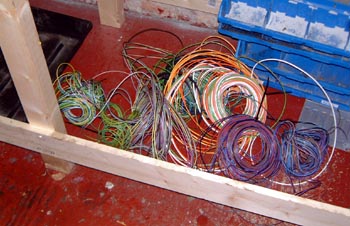
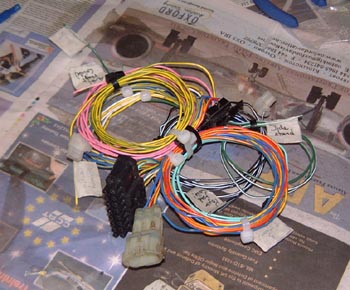
I went up to Chris's at the weekend. Chris is a cam7er who, for various reasons has a large quantity of wire in his garage. I snaffled enough of it to make a loom with, for the grand total of £3. I haven't actually paid him yet but I will, honest!
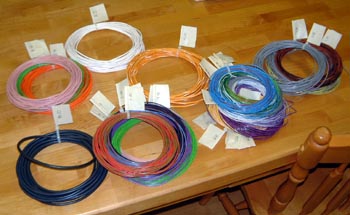 Today I just spent a long time sorting out all the wires and making it into neat piles, as seen here.
Tomorrow I'll start making the loom, I hope.
Today I just spent a long time sorting out all the wires and making it into neat piles, as seen here.
Tomorrow I'll start making the loom, I hope.
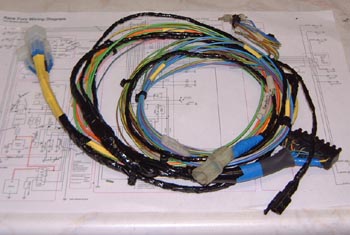
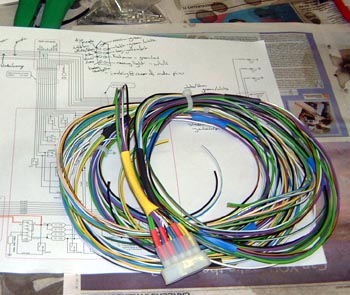 Today I finally started making the wiring loom, I realised that this is the
first bit of the new car that I've actually made so this is a bit of a milestone. I finished at the point
where I had the main front to back bit of the loom (really it's mostly lighing wiring).
Today I finally started making the wiring loom, I realised that this is the
first bit of the new car that I've actually made so this is a bit of a milestone. I finished at the point
where I had the main front to back bit of the loom (really it's mostly lighing wiring).
I've also updated the loom diagram so it's now got lots of wiring colours on it. I have aimed to make the loom as simple as possible, but the idea is to put some effort into making sure the connections are really good so as to cause as few problems as possible. With that in mind the connections in the loom, which are current all to the connector at the bottom of the picture, are going to be crimped, soldered and with some heat-shrink over the top...
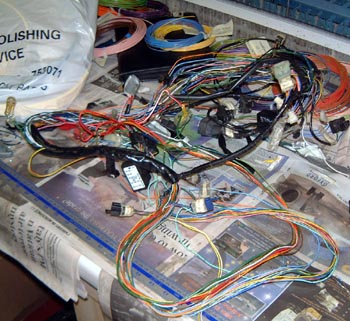 I managed to spend quite a long time on car things this weekend, which is quite a nice
change! I made good progress on the wiring loom. Of particular interest here was integrating the loom from the
bike, which is in the photo here with the bits of the loom that I was making. The loom as shown here is for the
entire bike and includes all the headlamp relays and so on.
I managed to spend quite a long time on car things this weekend, which is quite a nice
change! I made good progress on the wiring loom. Of particular interest here was integrating the loom from the
bike, which is in the photo here with the bits of the loom that I was making. The loom as shown here is for the
entire bike and includes all the headlamp relays and so on.
First of all I stripped everything out of this loom that I really needed, which was really the CDi connector and everything intimately associated with it.
 That left me with this rather smaller pile of wire here. As usual for me, I've
labelled the wires as my dodgy colour vision can, occasionally, lead me astray.
That left me with this rather smaller pile of wire here. As usual for me, I've
labelled the wires as my dodgy colour vision can, occasionally, lead me astray.
One interesting bit about the required loom is that the fireblade includes a device, I suspect in the ignition switch, that is protection against hot-wiring the bike. This is defeated by putting a 390 ohm resistor into one of the wires from the CDi unit (the pink one, in fact), the other end of which goes to the 12V power rail. This resistor was already there as the original owner had test run the bike, although in his case he had bodged the entire loom around. I did this neatly (his soldering was appalling) and used lots of shrinkwrap to hold everything in place.
 Taking the cut-down fireblade loom I added all the wires and connectors to make
everything work in the car, and ended up with this pile of stuff here.
Taking the cut-down fireblade loom I added all the wires and connectors to make
everything work in the car, and ended up with this pile of stuff here.
This is everything connected to the connectors marked as "engine/scuttle connectors" in the wiring diagram, which I have been updating as I go. Obviously I've had to guess the lengths of all the wires, but they're mostly left as flying leads so that I can terminate them properly once the loom is in the car.
This all means that I've finished all of the loom, with the exception of the wiring for the dash. I ordered a bunch of stuff before the weekend from Vehice Wiring Products with which to make most of the dash so I can probably mock that up in a while. I've decided to make a lot of very simple switchgear (easier to flail at in a crisis) using mostly toggle switches. I've also been experimenting with high-brightness LEDs to make the dashboard lights. That's been pretty successfu; and I'll use a collection of such lights for dashboard, probably with a large cluster, such as this, for the low oil pressure warning light.
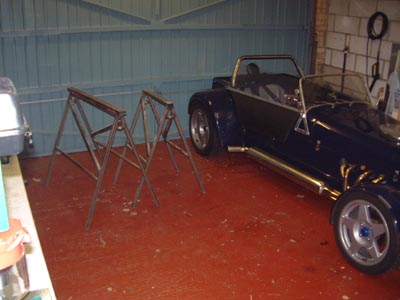 Having made some decent progress on the loom, I turned my attentions to the garage. The
big problwm with building this car is going to be the Dax, in that it's in the way. I could put it out on the drive
under a cover but experience has been pretty poor with such things, and it would be really in the way of the rest
of the family. So, for now, I'll see how I get on with it in the garage. So, I spent some time getting it as far
over to the side as I could (there's literally about 5mm to spare now). I'm still not sure how good it's going
to be. However, I also put together the old Westfield chassis stands that I had sometime ago, now much modified.
These have been used to build both of my previous kit cars and a couple of other people's cars too. They still
seem to work all right, luckily.
Having made some decent progress on the loom, I turned my attentions to the garage. The
big problwm with building this car is going to be the Dax, in that it's in the way. I could put it out on the drive
under a cover but experience has been pretty poor with such things, and it would be really in the way of the rest
of the family. So, for now, I'll see how I get on with it in the garage. So, I spent some time getting it as far
over to the side as I could (there's literally about 5mm to spare now). I'm still not sure how good it's going
to be. However, I also put together the old Westfield chassis stands that I had sometime ago, now much modified.
These have been used to build both of my previous kit cars and a couple of other people's cars too. They still
seem to work all right, luckily.
I sent an email to Martin Bell this week, trying to check up on the delivery time of my chassis. It still seems as though it might happen in time, which would be this coming Saturday. However, it's not really possible to be sure. What I don't know about is how much of the rest of the stuff will also be coming. Still, as long as I've got something to do...
Bummer! I had an email from Martin Bell today telling me that the chassis was delayed until the middle/end of next week. He says that one of the problem is the odd size of the roll cage (to go over my head). Oh well, I really will have to work out some way of mocking up the dashboard then.