 While I had the scuttle off I thought I'd sort out a gaiter for the handbrake.
So I made a pattern using bits of newspaper and got some more of the vinyl used for the dash and made something
up with that. It isn't the nicest thing in the world but as it should be just about invisible that's not a huge
problem.
While I had the scuttle off I thought I'd sort out a gaiter for the handbrake.
So I made a pattern using bits of newspaper and got some more of the vinyl used for the dash and made something
up with that. It isn't the nicest thing in the world but as it should be just about invisible that's not a huge
problem.
I fixed it in position by bonding it with Würth, I considered putting some popper fasteners on it, such as are used on tonneaux, but couldn't work out how to get a pop rivetter at the relevant bits
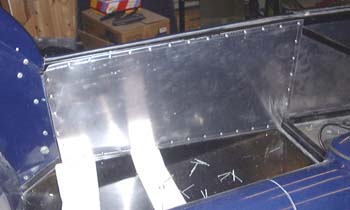 Next, again as the scuttle is still off, I decided to sort out some inner panels. I'm not
entirely sure whether they are supplied with the carpet set, as I know Dax now supply them with the initial kit.
However, as I've fitted panels to the outside of the chassis I don't want inner panels that go right down into
the footwell, as the Dax ones apparently do. The reason for this is that they effectively reduce the width of the
footwell by about 25mm, and when you've got size 12 feet like me, this is important.
Next, again as the scuttle is still off, I decided to sort out some inner panels. I'm not
entirely sure whether they are supplied with the carpet set, as I know Dax now supply them with the initial kit.
However, as I've fitted panels to the outside of the chassis I don't want inner panels that go right down into
the footwell, as the Dax ones apparently do. The reason for this is that they effectively reduce the width of the
footwell by about 25mm, and when you've got size 12 feet like me, this is important.
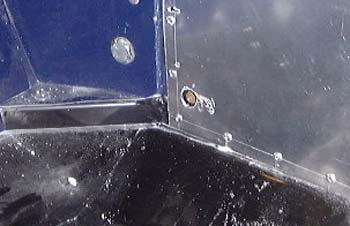
So, I made a template out of cardboard, cut a lump of aluminium to size and rivetted and bonded it in position. (I did remember to mark where the seatbelt mounting point is first!) Unfortunately I couldn't get on to do the other side as I don't have a piece of aluminium that's big enough.
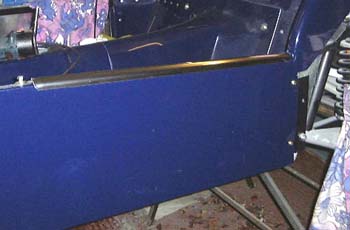 This evening I did the inner panel on the other side. Also, as adding the panel
makes the top of the side of the car the right width I could try the shiny kick strip on it. It looks really nice,
and also seems to sit square on top of the missing return on the top of the bodywork sides. So, hopefully all that
faffing with the sidepanels is going to work out OK.
This evening I did the inner panel on the other side. Also, as adding the panel
makes the top of the side of the car the right width I could try the shiny kick strip on it. It looks really nice,
and also seems to sit square on top of the missing return on the top of the bodywork sides. So, hopefully all that
faffing with the sidepanels is going to work out OK.
I also spoke to the chap supplying my wheels today. Supposedly, I'll get them this week, possibly Wednesday. They're being delivered to my office so I'll have to ferry them home in the boot of the MR2, one at a time!
 I had realised that I put on the left hand inner panel without clearing the
hole for the seatbelt mounting. <fx: Homer Simpson noise> So, I did a bunch of measuring and worked out where
it was and used a dremel to slice out the aluminium very carefully until I could get the seatbelt bolts in. Phew!
I had realised that I put on the left hand inner panel without clearing the
hole for the seatbelt mounting. <fx: Homer Simpson noise> So, I did a bunch of measuring and worked out where
it was and used a dremel to slice out the aluminium very carefully until I could get the seatbelt bolts in. Phew!
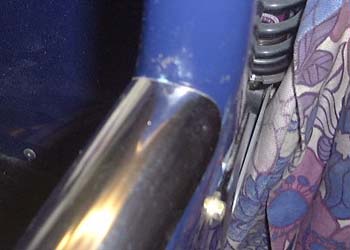
Then, I had decided that I wanted to have a bit of a look at the kick-strips. There are two issues here. First of all the rear-most end doesn't fit very well around the front bits of the rear tub. Secondly, the strips are really too long, in that they overlap the rear of the scuttle by quite a large amount.
 So, I first of all trimmed the rear end of the strips, using a rotary stone,
so that they fitted snugly against the rear tub. They cover up quite a lot of gruesomeness, and with the plastic
trim that Dax supply it should look quite acceptable around here. It's not quite clear at the moment how this is
going to fit with the rear wheel arches, but perhaps I'll have a look at that soon.
So, I first of all trimmed the rear end of the strips, using a rotary stone,
so that they fitted snugly against the rear tub. They cover up quite a lot of gruesomeness, and with the plastic
trim that Dax supply it should look quite acceptable around here. It's not quite clear at the moment how this is
going to fit with the rear wheel arches, but perhaps I'll have a look at that soon.
 The problem at the front of the strips is the amount of overlap. I suspect that Dax supply
them like this to be sure that they're long enough, but I really am going to have to trim them as the scuttle won't
really sit down properly without it. What I'd like to do is to get them like the Dax demo car that I was looking
at at Dax the other day. That is, with the strip just under the black trim strip that loops around the back of
the scuttle, but not actually under the scuttle itself. This will involve some fairly careful measuring but sounds
OK.
The problem at the front of the strips is the amount of overlap. I suspect that Dax supply
them like this to be sure that they're long enough, but I really am going to have to trim them as the scuttle won't
really sit down properly without it. What I'd like to do is to get them like the Dax demo car that I was looking
at at Dax the other day. That is, with the strip just under the black trim strip that loops around the back of
the scuttle, but not actually under the scuttle itself. This will involve some fairly careful measuring but sounds
OK.
Finally, as the to-do list is getting shorter, I decided to phone Swansea and ask for some SVA application forms. Here we go again! According to rumour, it's now much easier to get an SVA test than when I did the Westfield.
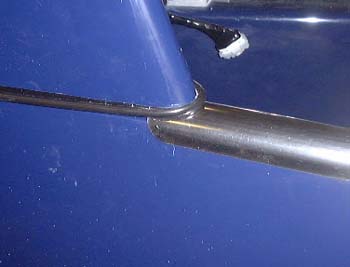
 I trimmed the kick strips to length tonight, which was quite easy. I'm hoping
that with then right length it'll be possible to fit them without having to take the scuttle off.
I trimmed the kick strips to length tonight, which was quite easy. I'm hoping
that with then right length it'll be possible to fit them without having to take the scuttle off.
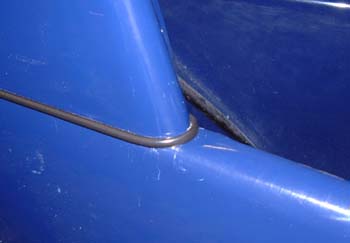
Having done that, it was time to refit the scuttle. This time I wrapped the ends of the trim around the back of the scuttle and bolted it down so that the trim was trapped under the scuttle. I cut the flat bit of the trim a bit so that it could go round the "nose" of the edge of the scuttle. In fact, that worked much more successfully than I thought it would.
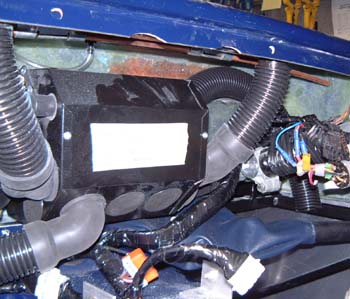 So, with the scuttle back on again (I keep hoping that it will stay there this time...)
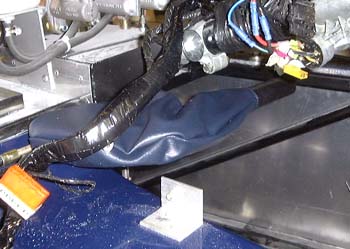
I made the heater takeoff pipes work properly. The Dax-supplied heater has a collection of places to take air off
and it's a bit tricky to work out which one to use and fit the pipework around all the stuff in the scuttle. However,
it ended up looking like it is in the photo.
So, with the scuttle back on again (I keep hoping that it will stay there this time...)
I made the heater takeoff pipes work properly. The Dax-supplied heater has a collection of places to take air off
and it's a bit tricky to work out which one to use and fit the pipework around all the stuff in the scuttle. However,
it ended up looking like it is in the photo.
Currently, the pipes down into the footwells are not attached to anything. I'll probably have to stick them down with Würth or something as at the moment they're flopping about a bit.
in case you've got to this frame directly and can't get out, go here.