 I'm
late writing this, as usual. This is because I've been really busy, as usual, and there's a huge problem which
has stopped the end of this season for me. I'm somewhat hacked off about this, to put it mildly.
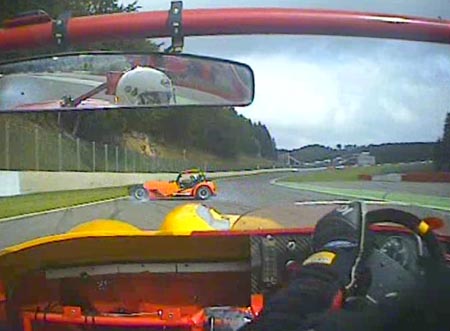
After the successful Silverstone race, we went to Spa in Belgium for a couple of track days. Essentially, I had a great time. It's a fantastic circuit and, to be honest, puts all UK circuits in the shade. The only incident of note for all of the two days was this orange R1 Westfield which spun across the track in front of me at Blanchimont when the driver hit the apex hard, went wide and then lost it (probably because he did something daft like lifting off) and speared across the circuit into the wall.
That was a bit alarming really, as I was flat in 6th at about 110mph normally at that point of the circuit. Admittedly I wasn't on that particular lap as the Westfield had been holding me up for a couple of laps and I was "only" doing about 95mph. Mind you, that seemed pedestrian in comparison.
And, as you will see, that's it for the year.
The final races of the season were due to be at Snetterton the weekend of September 29th and 30th. The problem with this is that my daughter, Jo, was getting married on the first of those dates and I seemed to have some part to play in the proceedings! So, the plan was that I'd get my friend Matt to race in the Saturday race. Matt's got a lot of race experience and I thought that seeing how he did, and in particular looking at the logs, would be really illuminating.
I'd then go along on the Sunday, start at the back of the grid and hope for at least two points, which you get for starting and finishing. Those two points might help me stay ahead of Colin in the championship standings.
Everything went swimmingly organising this and Matt booked a half day testing on the friday morning. We went up to Snetterton early and Matt went out for the first session. The track was mostly empty as it was early and pretty wet. After about three laps Matt came in and said that there was a vibration coming from the rear end. So, I had a good look round the suspension and diff mountings (which have come loose before) and couldn't see anything. In retrospect I should have looked hard at the propshaft, even though I'd checked it carefully the weekend before.
So, Matt went out again and even before he came around for the first time the session was red-flagged. I waited in the pitlane for him to come around and, alarmingly, he didn't. One person who did come in was Colin Duce, another RGBer. Even worse Colin told me that he'd seen my car on the far side of the circuit on fire! I felt sick for a few moments until he told me that he'd seen Matt standing clear of the car.
Things went from bad to worse after that really. First of all I spotted loads of black smoke drifting across the circuit, and someone pointed out that that probably meant the GRP had caught fire. That could be very, very bad news as once the resin in GRP gets going it's proverbially difficult to put out.
 Eventually
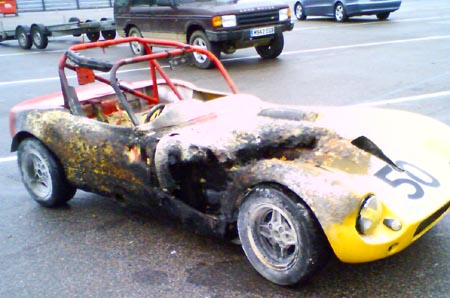
the car did come back in on the back of the rescue vehicle and it looked in a very sad state. This photo looks
crappy because it was taken with my phone. However, as you can see things look pretty sad.
While at the circuit we hose the car down with water to try and get the extinguisher powder off it as much as possible. I found out later that the fire crews had used 8 extinguishers on the car! What's more, apparently they're now using the video from the circuit cameras as part of their training!
 I did
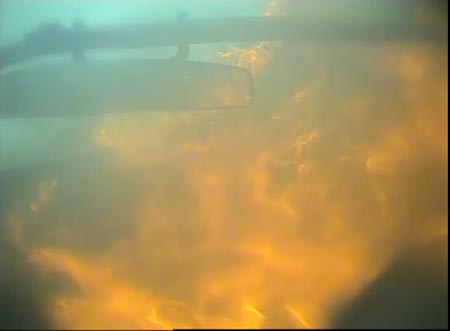
later see if I could get anything from the in-car video. Surprisingly there was a little bit of accessible data
from which this shot comes. I don't know about you, dear reader, but that scares the crap out of me.
 Of course,
the big thing is what happened? At the time of writing I don't really have the complete picture. However, I have
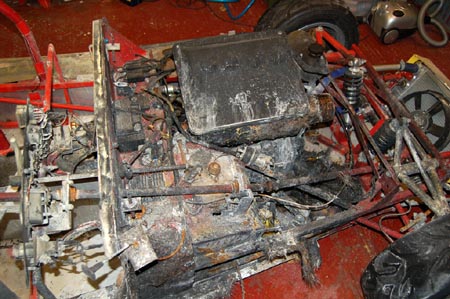
now taken the car off the trailer and taken most of the, now junk, bodywork off it. I had hoped that when I did
this I was going to feel more positive about it as the bodywork is clearly the worst part of it all. However, if
anything it looks worse with the bodywork off. Hence I feel ever glummer than I did before.
However, this and the investigations at the circuit make me think that the sequence of events could be something like this:
- Somehow or other the propshaft adapter became disconnected from the engine. I have no idea how this could be the case, as I check it pretty frequently.
- The prop started flailing around. Again, I don't know how this is possible, as even with the adapter not bolted in there isn't normally enough clearance for the adapter to slide off the splines. I do wonder if the centre bearing has failed, which might explain everything.
- The front part of the prop bashed into lots of things. Matt said that the first thing he noticed was a huge
bang which would fit with this. In the process of this a number of things were bashed up, although I don't know
in what order:
- The engine casing acquired a large hole and in the process the starter was smashed to pieces; we found bits of it all over the engine bay.
- The air box acquired a large hole in the bottom of it.
- The rear engine mounting was bent. (A 25mm by 5mm piece of steel!)
- The adapter was torn off the propshaft. So far I've only found one of the mounting bolts. Both ends of this have been sheared off and the remainder is jammed inside the now rather mangled propshaft adapter.
Mind you, that's all speculation really.
The thing now is to strip what I need down. At first sight I'm going to have to spend rather longer in the garage this winter than I'd intended. And, even worse, I'm going to have to miss the Birkett! The list of things to replace looks like this at the moment, but will doubtless expand:
- Bodywork
- Engine
- Propshaft and adapter
- Most, if not all, of the wiring
- Dash, switchgear and instruments
- Brake master cylinders
- Brake fluid reservoir
- Brake bias adjuster
- Brake lines
- Throttle cable
- Clutch cable
- Steering column bearings and UJs
- Gearchange bearings
- Front springs and, possibly, dampers.
I shouldn't have written that list; I've made myself feel ill.
I've started taking the car to bits properly now. It's clear that rebuilding it will essentially be one of completely stripping the car back to just in front of the rear axle and working back from there. As far as I can see, the only components that could stay in place on such a strip down are the floor panels, and only because I don't really want to disturb the rivets that hold those in. However, there's just too much extinguisher powder everywhere to do anything else with the rest of it. The problem is that once I do strip it all down, actually cleaning all the extinguisher powder off will be hellishly difficult. I was wondering about buying a grit blasting kit. However, the necessity of going it in the garage could well mean that the entire house gets filled up with abrasive dust, which doesn't sound too clever.
In the meantime, I don't really know what to do with the car once it's stripped. The most likely possibility is just building it up the way it was before. However, the thought of building a different car, possibly in a different class, is a possibility. The thing is, though, that the racing in class C is such good fun.
Anyway, before I think about that I need to get everything to pieces, if only because I'd want to use lots of bits again.
 However,
on with the disassembly for now. Here's a bunch of photos of the devastation.
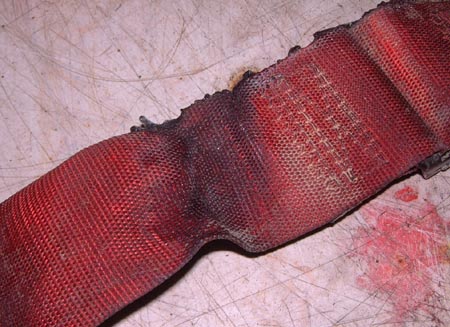
My super-nice Schroth harnesses are toast. Not surprising really. I'd already decided that I'd have to replace them and this just confirms it. I do actually have another set that I use for the passenger seat. Perhaps I'll just reuse those?
 The
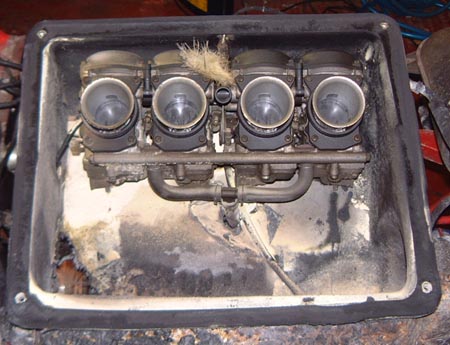
top of the airbox was pretty badly damaged and when I took it off there was loads of extinguisher power in there.
I think the marshalls are trained to squirt things into the engine inlets like this which probably makes sense,
even though it does tend to lunch the engines.
However, note that there's a big hole at the bottom left of the airbox.
 And,
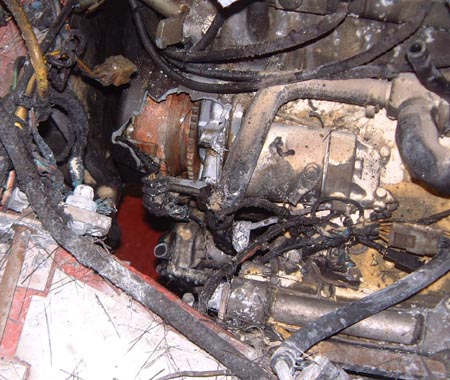
when the airbox is taken off, there's an even bigger hole in the engine. That's the starter ring gear that you
can see there and the internals of the alternator. The starter gearing is just smashed to pieces, although the
main body of the motor is still there.
It's not going to be very much use though. In fact, I remembered that this is the starter off the first engine I had. This current one was bought without ancillaries as the starter had survived the first engine blow-up at Mallory. I seem to have fixed it now though. :(
 The
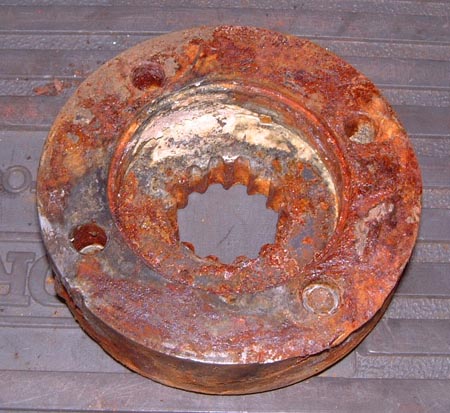
thing is, what did the smashing?
This is the culprit which is the propshaft adapter gadget. The extreme rusty nature of this is due to the corrosive nature of the extinguisher powder. Also , you can see that there's the remains of a prop connection bolt at the bottom right hole.
This thing used to look like this. What's more, that's what it looked like a couple of weeks ago before I set about fixing it.
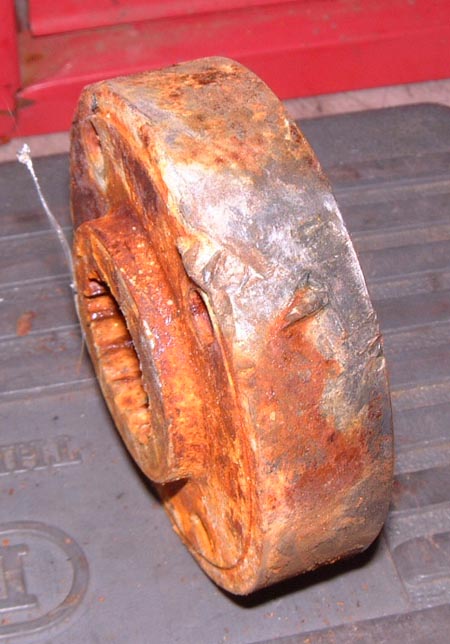 There's
also a lot of damage to the adapter. Considering that it's just a solid block of steel you can probably image the
force needed to bash it up like this.
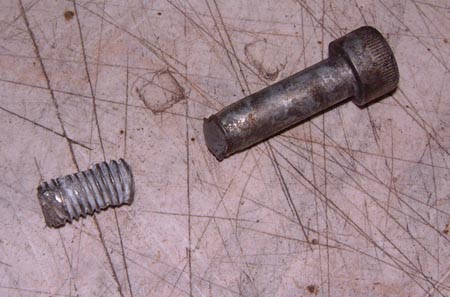 The
thing is, why did I find the adapter just sitting on the floor panel. Simple really, as I also found a collection
of pieces of the bolts that held it to the propshaft sitting around looking like this. In fact, when I took the
floor off there was large collection of broken bits of engine and prop bolts sitting on it.
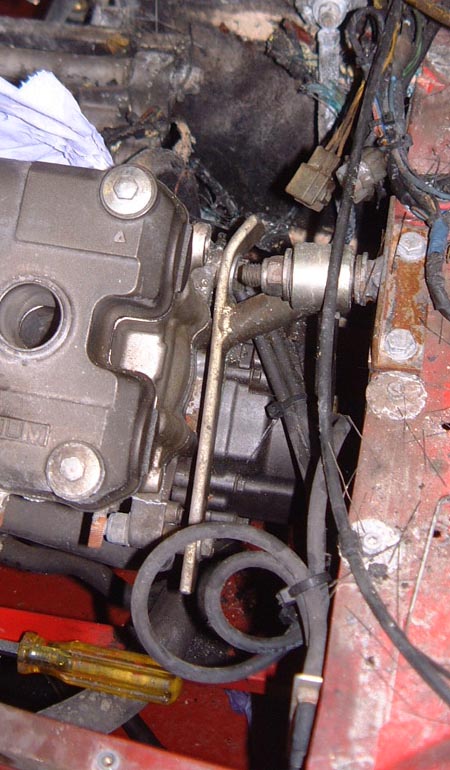 A further
clue to the forces is this photo. The end of the engine mounting, which is just a lump of mild steel about 25mm
x 5mm, has been bent over. In fact, the end of the mounting has a very obvious mark where the adapter has hit it
at some speed.
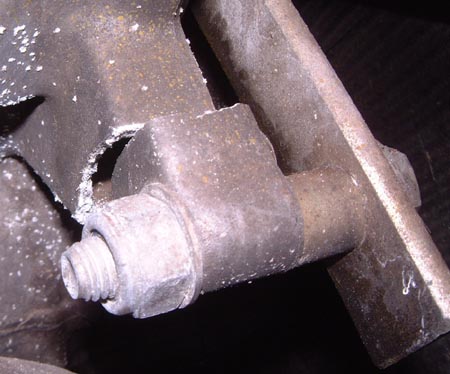 What's
more, the forces unleashed by that blow to the engine mounting also bent one of the long engine mounting bolts
on the far (right hand) side of the engine and sheared off this lug on the engine block. (You can just see this
broken bit at the bottom of the previous photo.)
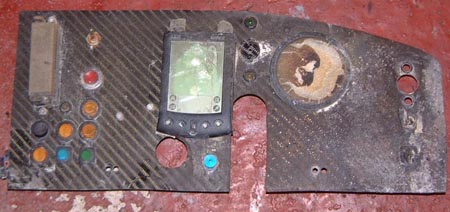 Apart
from the mechanical mayhem there's also the fire damage. As you can see the dash (and in particular the tacho)
has suffered rather badly.
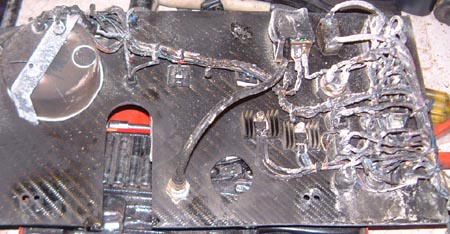 The
back of the dash is also smoke damaged, although most of the cable insulation is actually OK. That is the wiring's
better than it looks here. Mind you, the wiring in the tunnel, around where the fuel line was severed, is much
worse than this.
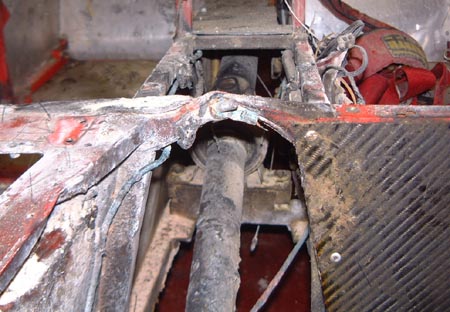 Most
significant, though, is this.This is the looking rearwards down the prop tunnel. That elegant curve at the top
used to be a piece of 25mm square tubing. The prop has hit it so hard that it's completely flattened in the middle.
The propshaft adapter has also hit the top of the pedal box, which is the cause of the dent on the left side of
the photo.
This makes you realise why the pedal box is steel. I was always a bit concerned that this area in my old Dax was a good deal less robust than this. This just confirms my worries.
All of this, though, doesn't really explain things. The end conclusion is that it was just due to the centre mounting of the propshaft adapter coming loose, the mounting bolt was part of the debris that I found on the floor. Obviously the centre bearing has just flexed enough for it to climb off the splines and away it went. This'll be the bang that Matt heard.
I have had the odd vibration recently. I wonder if this could have been due to the adapter shuttling about on the splines? On close inspection, under the corrosion, the splines on the adapter don't look too clever so I guess that's it. Clearly, the way I was inspecting this was not satisfactory as I checked it, or so I thought, very recently. Assuming the centre bolt didn't fail then it must have been working loose for a while. In a way, I'm lucky that so much of the car is salvageable. If this had happened at Spa, especially with Tom driving, I shudder to think what would have happened.
 The
stripdown has continued apace. It's lucky this has all happened at the end of the season. All the same, I could
easily see me being strapped for time come February.
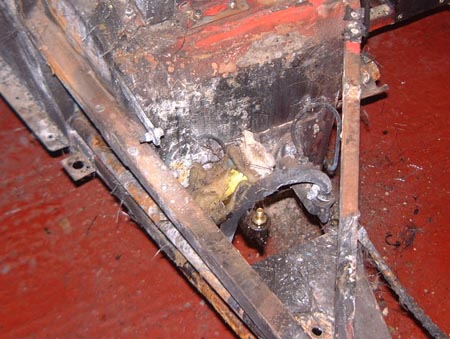
Here's another photo of the devastation, though. That yellowish blob is the remains of the brake fluid reservoir. Admittedly this was just polythene, or something like that. All the same, it's now wrapped around one of the brake master cylinders, never to come away. I'd already decided that I ought to replace the master cylinders in any case so I hope once I come to take all this off I can actually separate it from the car.
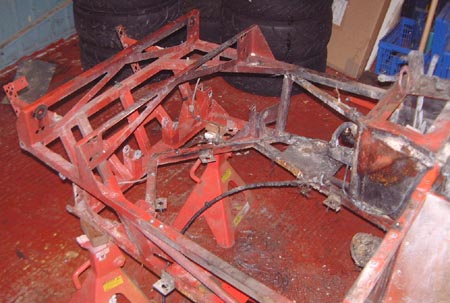 I've
not just about removed everything from the very front of the chassis, which now looks like this. There's a few
things like cable-tie bases remaining but it's just about done.
I've also been wondering about what to do next, once I've finished the stripdown. The more I think about it, the more I think that getting the whole thing back to a bare chassis is the right thing to do. I should be able to them get the entire thing shot blasted which ought to mean that I'll be able to see clearly what I need to do and will make the process of rebuilding it much more pleasant. I'll probably make some enquiries over the next week or so as I get on with the stuff that I've got to do in any case.
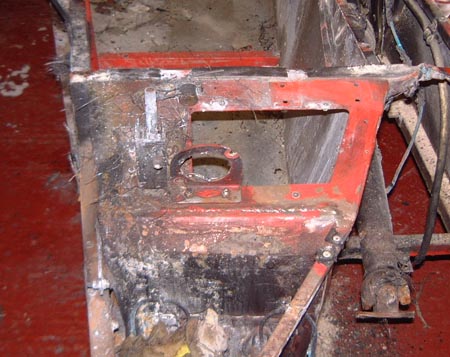 The
chassis isn't as bad as it appears at first sight though. I decided to have a quick scrape with a wire brush at
the top of the pedal box and it was interesting that underneath the black gunge and the extinguisher powder there
was still lots of red paint, as you can see on the right hand side of the photo here. I only had a few minutes
to do this, which is why the left hand side is still gunged up. However, this is encouraging as it means the chassis
is probably OK underneath all the devastation.
I had a similar look at a part of the roll cage too. That was completely black with what looked like a case of the measles where there were bobbles on the surface. I had a quick rub with a lump of wire wool and the black stuff was shown to be just soot. Under that was more red paint, with some grey primer underneath. The bobbles are just bits where the paint has blistered.
Again, the notion of shot-blasting (or do I mean bead-blasting?) the entire chassis and roll cage is quite attractive as I could then get the whole thing looking good again.
While I'm at this stage in the chassis, I have been wondering about modifying the way that the engine mountings work. One of the standard Fisher mountings, the one on the right of the engine, sits on a support leg that bolts to that plate in front of the brake master cylinders. In fact, you can see the mounting hole in it in the photo of the melted reservoir above. This approach to mounting the engine is really a hangover from the Furies that have things like Zetecs in them, in many ways it's not appropriate to the bike-engined cars.
Dan's made up a collection of custom engine mounts for his R1 engined Fury and I'm thinking that the Blade engine could be easily supported in a slightly different way on this side of the engine bay. That might give me a bit more clearance in front of the pedal box which would mean that I could extend it some more which would allow me to get a bit lower in the car which should help get the CoG down a bit. What's more, if I remake the pedal box then I might be able to find space to fit some nicer pedals than the rather poxy Fisher ones. Although, to be fair, they do work. I'm rather taken by spiffy pedals though.
Typical really. I can't just rebuild the thing how it was before, I have to start modifying it...
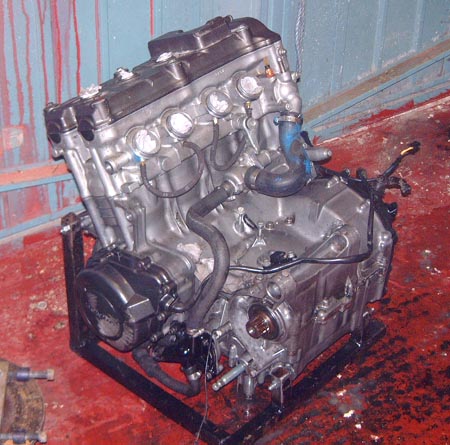 Well,
I've started spending money again!
Here's a new engine for the car. This came from John Goodwin who's another RGBer but who's planning on moving on from class C, although he's not sure where he's going next. Anyway, this is his spare engine which I've now bought.
I'll need to find a starter motor for it, and decide if my carbs are OK. I'll also need to fit my billet sump to it as it currently has the standard sump which is too deep for the race car. This will mean that I'll have a pile of three (!) standard fireblade sumps. Surely there must be something that I can do with them.
Much as I did with the first blown engine, I'll probably strip the newly battered engine. I'm hoping that I'll be able to salvage at least the gearbox from it.
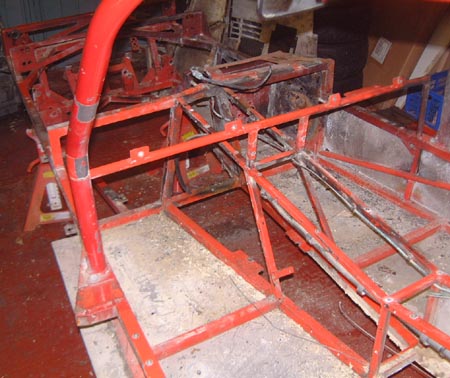 I've
continued apace on the rest of the chassis and this is where I've got to. As I've already noted if you scrape off
the soot and extinguisher powder it looks a lot better than I thought it did. I'm more and more convinced that
stripping it back to the bare chassis is the right thing to do. It's a bit more work but I suspect that it'll ease
the rebuild process considerably.
 You'll
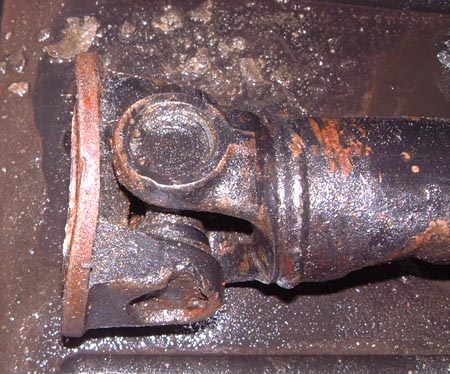
notice in the photo above that there's no prop there. I've taken it out and here's a closeup of the front end.
This is alarmingly battered. The end plate is warped (which'll be what snapped all the mounting bolts) and you can see a lump missing out of one of the yokes.
I'm not sure whether just to buy a new one, or whether to try and get this one fixed. I suspect, having looked up what I paid for it, that I'll ask Bailey Morris to have a go at rebuilding it. They might be able to use the existing rear section and fit a new front bit.
I did wonder, though, whether I ought to get one with the rubberised connection in the rear part of the prop. The current one uses such a connection and I'm not totally sure that it's needed on a race car. It clearly adds some weight. Problem is, if I was to have a prop made without the rubber I might decide that it was just awful and have to get another one.