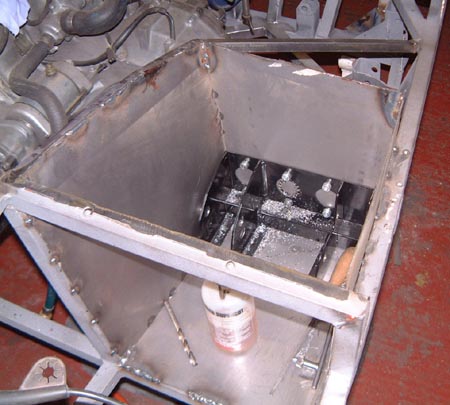
 Progress has continued, but still very slowly. The main thing has been the continuing modifications
to the chassis. I've just about got the pedal box made now, as in the photo. You can see the frame of the new pedals
sitting in the bottom and a collection of holes being stitch-drilled into the back panel as as to allow the master
cylinders to be mounted.
I haven't put a top on the box yet, because I may well want to change the height slightly when I refit the steering.
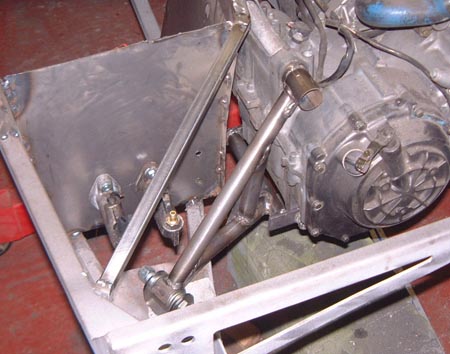 Next
thing was to re-fabricate the engine mountings for this side of the engine. I've done this, mostly, with the same
CDS tubing that I used to make the wishbones out of, and of which I've got a decent stock at the moment. After
the problems I've had in the past with these mountings cracking I'll have to keep a very careful eye on them to
see if anything untoward starts happening.
In this photo you can see the (old) master cylinders in position. It's because of these that I had to remake the mountings at all as the old ones bashed into the master cylinders.
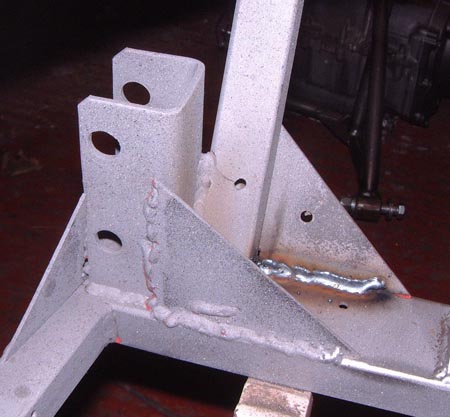 Finally,
at least on the chassis, I could move onto finishing off all the welding. I've done all round the pedal box itself
and I was checking a few other bits of the chassis and noticed this crack, which is the mate of the one that made
the front suspension fall to bits at Brands Hatch this year. You can see where I was adding an additional weld
to the strengthening gusset on the right and it seems likely that this strut would have failed too were it not
for the gusset and the judiciously located hole which seems to have stopped the crack growing.
As well as checking the welding on the gussets I've added some extra plates around here to strengthen things up. I must admit that I keep wishing I'd just cut off the entire front of the chassis and remade it all. If nothing else, that's a job for next winter.
I need to finish up all the rest of the welding on the chassis, which shouldn't take too long, and I can then see about painting the chassis and starting to panel it. I've been wondering about doing the floor panel in one complete piece, although I'm not sure if it's too big. It would make the underside a little cleaner but it would mean that any offs into the gravel trap were harder to clean up. Need to think about that...
 Sorry,
but this is going to be another rushed update as life's rather fraught at the moment. One good thing is that Fishers
have just phoned up and told me that my bodywork is ready. I'll probably go down and pick it up in the New Year
as getting it done before Christmas is a non starter.
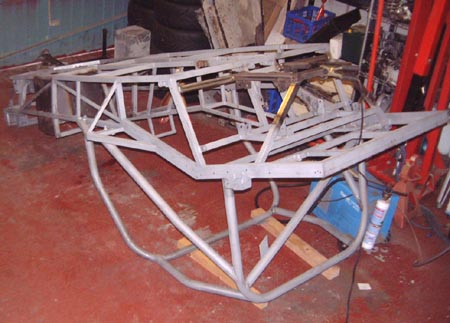
Pressing on with the chassis, which really took much longer than I thought it would, I turned it over again, this time with the help of Adrian. With it this way up I could finish the welding properly.
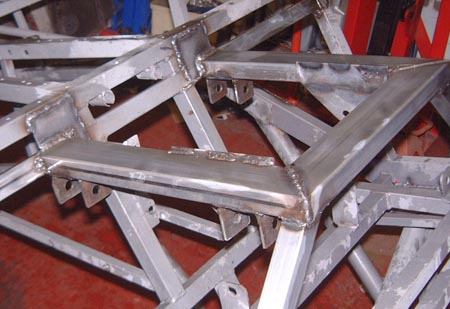 For
example, I put these little plates in at the front of the rear suspension carrier which should fix the new tubes
in position moderately well.
I must admit that while I was doing all this, I was increasingly wishing that I'd bitten the bullet and just remade a whole new chassis. having noticed that the bent rear end was still out of alignment I've also noticed that the long front (as added by Fishers after the smash at Donington in 2005 ) is also not lined up properly. I can understand me not getting it right but I paid good money for the original place to fix it. However, all the trouble that Dan's had with his chassis would tend to indicate that they're probably incompetent.
Still, that's something for next winter. I wonder how I can get a bigger garage before then?
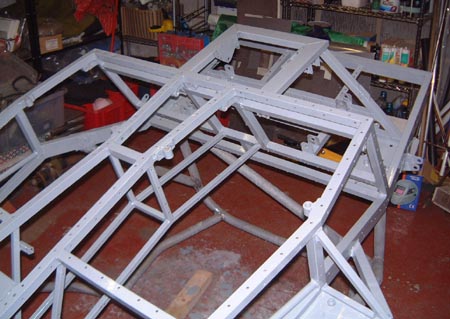 Next
thing to do was to paint the chassis. As I think I mentioned, I'm using POR-15 for this, as it has a reputation
of working and not falling off. I'm using grey, as you can see in the photo, as I reckon that gives me a better
chance of seeing if there are any cracks appearing in the chassis. Recent experience indicates that this is a good
idea!
The problem with what I've done, I now realise is that I did the bottom of the chassis first, as it was upside down when I started. I was a bit over enthusiastic when I applied the POR-15 and this meant there were quite a few drips on the top side of the chassis. Now I've turned it over and done the other side I had to wire-brush off the drips (they're very hard) and the end result is nothing like as neat as I would like, although it probably works fine. Oh well, next time I'll do it right.
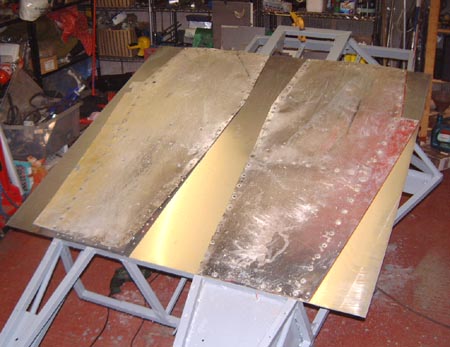 While
it was upside-down I fitted the floor panels. I've been wondering for a while how to make sure that I reused the
same rivet holes. In the end, I just used the old panels as templates. I used a few sacrificial rivets (annoyingly
I haven't got any Clekos of the right size) in the corners to hold them in place and just drilled through. After
all that, of course, I've got even more rivet residue inside the chassis that I used to have. However, as the whole
thing rattles like heck now with all the rubbish inside it I doubt a few rivets more will make any appreciable
difference.
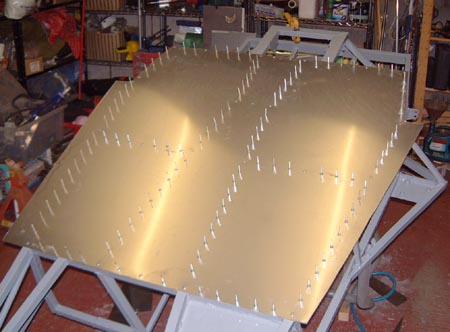 As
you can see, I've done the complete bottom of the chassis in one piece, just to make it a but cleaner underneath.
This means that I'll have to make sure I've got enough access at the top of the chassis into the transmission tunnel.
I think I know how to do this.
When I built this car I didn't have an air riveter; I know because it was this that kicked off the Carpal Tunnel Syndrome that I get in my wrists. Looking at all these rivets I can't work out why I didn't just go out and buy one at the time; they save a huge amount of time.
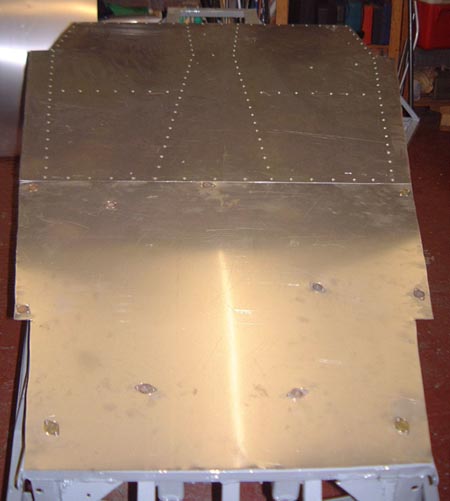 With
the chassis upside-down I also remade the removeable under-engine panel. As you can see in the photo this is attached
with Dzus fasteners which makes it (moderately) quick to remove. The biggest problem is usually the amount of under-car
grovelling that has to be done to get at the fasteners. I did give serious thought to attaching it with a load
of tiewraps but decided that it was just too naff.
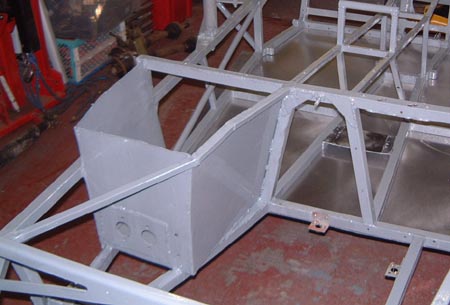 With
the chassis now back the right way up, I've finished POR-15ing it. As you can see, I've still not done the top
of the pedal box as I'me still not sure quite where the steering column is going to go. What's more, it's a lot
easier to get access to the pedals like this.
You can see the additional 3mm steel plate that I welded on the front of the pedal box here, to try and make sure that it doesn't flex, a common Fury problem, and one that still seemed to happen even with the new pedal box bolted into this steel box.
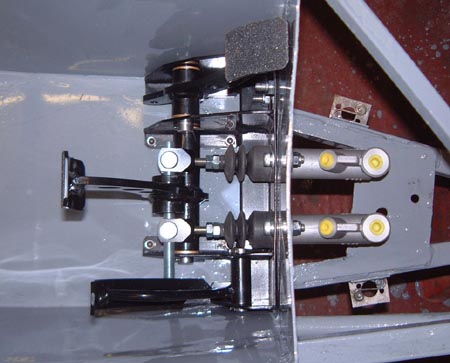 Looks
like the final update of another year. So, Happy New Year (you probably won't see this until after the celebrations)
to you all. Let's just hope I can get the car finished in time for the season start. Mind you, being late would
be a truly excellent excuse for the season. My personal nemesis, Colin Chapman, insists he's going to be 5 seconds
a lap quicker next year so I shall be languishing at the back. What's more, the chap who won the championship last
year, Derek Jones, is not only moving up to class A but he's already been testing with his new car which
is dangerously close to professionalism. Mind you, Colin reckons he's be beating Derek too...
Anyway, I've been trying to get some actual progress in which has not been easy. I have fitted the pedal box though, as in the photo here. I do, though, think I'll have to take it out again so as to arrange some sort of clutch and throttle cable arrangement. I'm actually trying not to reuse an Escort clutch cable, as last time, because the things are huge and unwieldy. After all, the bike clutch is designed to be hand operated so it doesn't need a sodding great thick cable. The problem with re-engineering this, though, is that the off the shelf cable has got fittings swaged to the end of it which is not really possible for me. I'll see how I get on with what I've got...
By the way, the reason the top of the pedal box is a bit wiggly is due to heat distortion from the welding. I'll pull it into shape when I do the roof of the box.
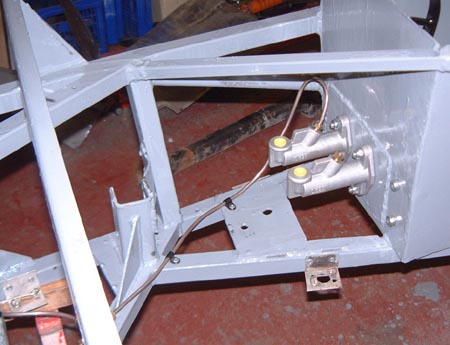 Next up was to do the hard brakes lines, which I ceremoniously chucked in the bin when I stripped the
car.
It's interesting doing things like this as this time I know a lot more about the car and can route the lines in a rather more sensible way than I managed before.
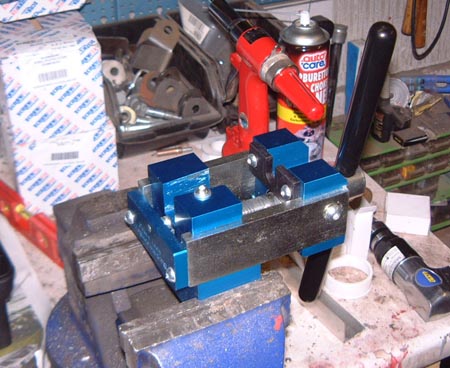 One
problem with doing the lines is that I've always had to borrow Steve's flaring tool of doom before as I
didn't have one. Much as it's a superb tool I decided to buy my own. It isn't as swanky as Steve's but it does
the job nicely here. The only problem is that it's vice mounted so I can't do the flares in situ as I could
with the FToD.
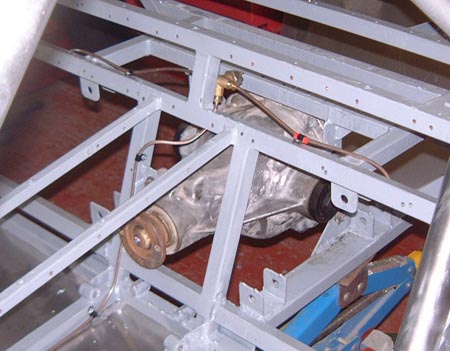 With
the lines in I also refitted the diff. This is something else where experience counts. I traditionally drop the
diff at some point in the process of refitting it. However, I've now learnt to a) rig up some sort of hoist using
some luggage straps to hold it when I slip and b) to put a great thick rug under it so that it bounces nicely.
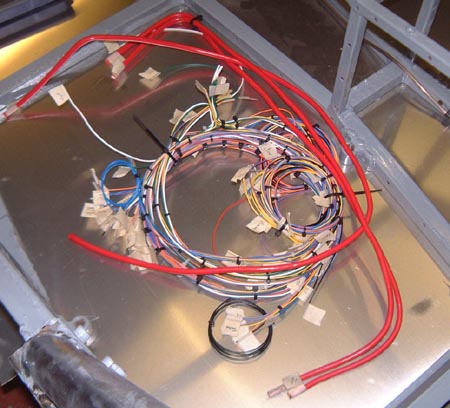 In
between times I've completely redesigned the car's loom. I've now managed to get around to cutting out all the
cable and making the loom itself.
I was intending to at least put some of the connectors onto this but I was chased away from the dining room table, my work surface of choice for loom work, with the flimsy excuse of it being Christmas Day. Once the festivities have finished I shall take up residence again. Until then, the loom's sitting inside the car. (Coo, isn't it shiny? :-)
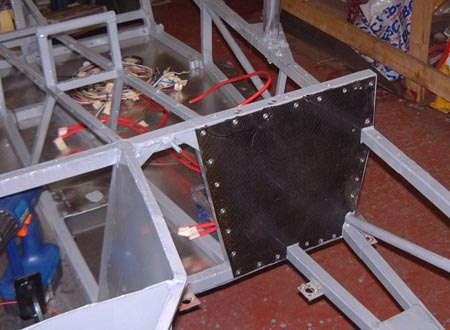 I've
started re-panelling the car. This is probably the single carbon panel that I shall have on the car as I can reuse
this one and there just isn't time to make any others.
In fact, the main reason for installing this one is so that I could
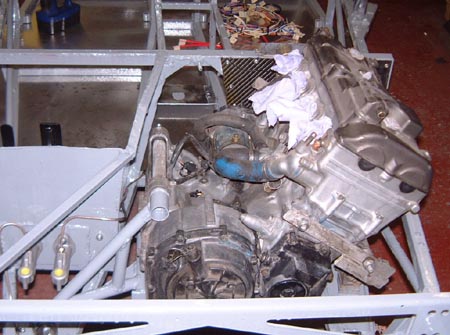 refit the engine. With any luck this will stay here for now. You can see the new engine mounts at the
left of the photo. I've POR15ed these too, as you can tell. I am intending to tie the upper rear part of the engine
to the top of the pedal box too, but I can't do that until I put the top on the box. It can wait for now.
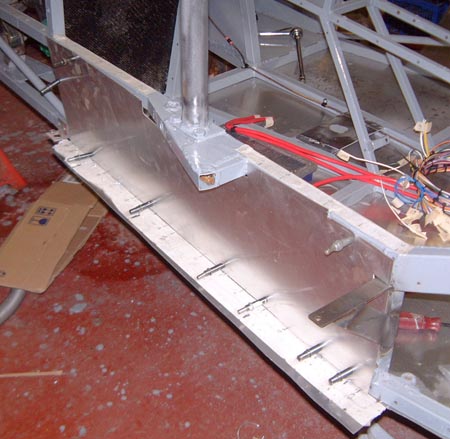 Back
on the panellling I've also put some ally on the left hand side of the car. Before doing this I remade the mount
for the rear of the exhaust, In an effort to make sure this doesn't bend it's the chunky bridge-like structure
at the bottom rear of this photo.
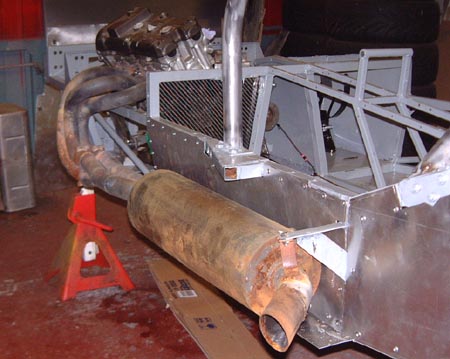 Here's the exhaust itself back on the car. Needless to say, that isn't paint, it's honest to goodness
rust. I did clean a good deal of this off before refitting the silencer but the camera seems to have shown it off
to great effect.
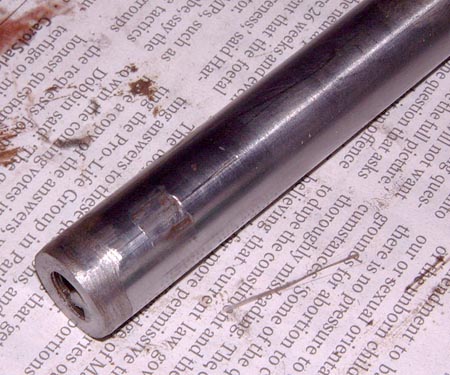 Back to the car and it seemed to be time to start on bits of the suspension, for one reason it would
look more like a car with something at each corner.
First thing was the front rockers. I took the bearings out of these to have a look at them and was rather dismayed as the level of wear there, after just one season. You can see where the bearings rollers have pressed into this rod in the photo pretty clearly.
I'm not sure what to do about this. I could probably get some new ones but I wonder about just going back to the old bushes. They actually seemed to work better than this...
All the same, I refitted everything and put the rockers on the car. To be honest, the bearings feel pretty much OK with the rockers on the car. It can't be good though.
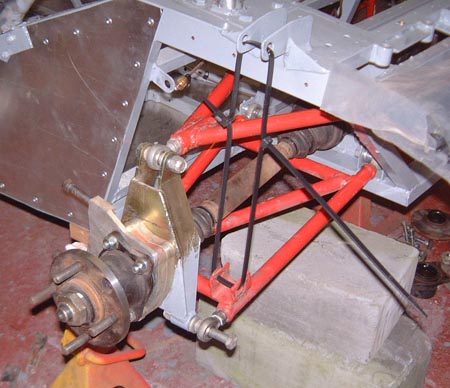 So, to the back of the car and here I struck a bit of a problem. I put one side of the car together
pretty easily, as in the photo. Part of this was stiffening up the rear uprights again (hence the POR15 on the
bottom half of the upright). This particular part seems to fail frequently, probably due to the huge loads on this
part of the suspension. I've tried to put some strength back in again with some additional steel and a good deal
of welding. We'll see how they get on.
However, when I got round the other side of the car I found that it didn't go together anything like as easily. To be honest, I 've had this sort of problem before but this time I wanted to really try and sort it out. So, I took everything in the photo apart again and spent ages measuring and checking everything to try and work out why one side of the suspension was so much easier to fit that the other. Eventually, I realised that the driveshafts are different lengths by about a centimetre which is a bit alarming. The shorter one is actually the one you can see here which fits rather better.
I'm in a bit of a quandary about what to do about this. I had wondered a while ago about getting some brand new driveshafts made as I could get single piece ones rather than the cut-and-shut jobs that I've got at the moment. They ought to end up a bit lighter too. (You can even get them rifle-drilled to save more weight but that might be going a bit far really.) Having thought about it (I was a bit hacked after fiddling with the rear suspension for an entire day) in peace a bit I think I'll refit the current ones but arrange to get a new pair made. That way I don't have to be on tenterhooks waiting for the new parts to arrive.
Problem is, I'm not too sure where to get them from. Nor am I clear how you measure how long you want them to be, the problem being that as the CV joints have some plunging capability it's not clear from where to where to measure them. Perhaps I ought to take the CV joints apart and measure to the tripod things inside?
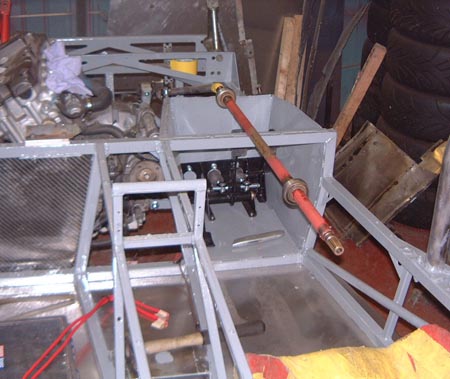 With
that mini-debâcle behind me I went back to the front of the car. I refitted the steering rack and then started
playing around with where to put the steering column, You can see the seat in the car here as I needed to sit in
the car and wave the wheel around until I knew where I wanted to put it.
I think I now know the answer to this and I can start, hopefully tomorrow, to put the top on the pedal box which means I'll have somewhere to mount the lower column bearing. I shall then have to work out where to add something to support the top of the column.