 Another long delay, I'm afraid. As last year this is half caused by the presence
of the ski season and the need to get away as often as possible.
Another long delay, I'm afraid. As last year this is half caused by the presence
of the ski season and the need to get away as often as possible.
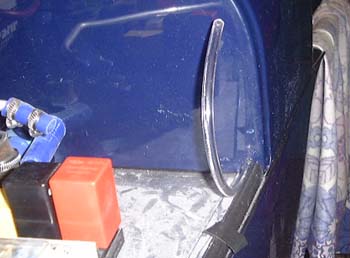
Anyway, I made it back into the garage today with the intention of fitting the scuttle properly. In fact I did do this, as you can see in the photo which shows the washer pipe appearing in the engine compartment.
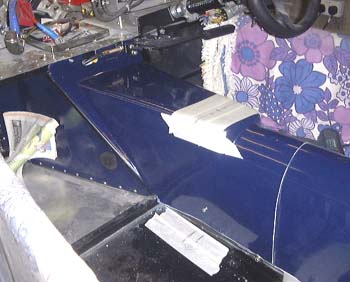
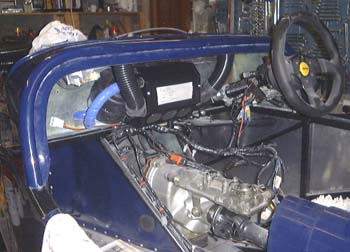 However, I then realised that the presence of the heater was going to make it much harder
to fit. Furthermore, it was clear that I really ought to fit the centre bits of bodywork first, so I took it off
again. As you can see in the photo things looks all of a sudden quite cramped here.
However, I then realised that the presence of the heater was going to make it much harder
to fit. Furthermore, it was clear that I really ought to fit the centre bits of bodywork first, so I took it off
again. As you can see in the photo things looks all of a sudden quite cramped here.
However, in order to do that there are a couple of other things that need doing first. The first was to finish off the handbrake, which was easily done with a certain amount of fiddling about.
After that I had a bit of a look at things. I did something small in that I took off the brake fluid reservoir and Hammerite'd the support bracket which had been looking a bit worse for wear. It's all nice and shiny now! This also means I could update the to-do list, which gives me a nice warm feeling!
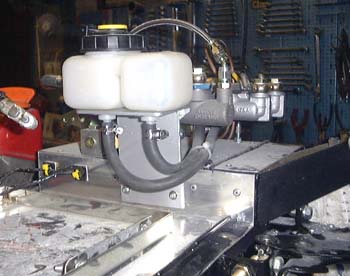 I reattached the brake fluid reservoir, hopefully it'll stay rust-free (ish)
now. As you can see in the photo some of the pipes are above the level of fluid in the reservoir. I'm sure this
is really OK, but I know Duncan had problems convincing the SVA inspector that this was fine. I might have to take
along a physics book with a discussion of siphons with me, or perhaps make him realise how a toilet works...
I reattached the brake fluid reservoir, hopefully it'll stay rust-free (ish)
now. As you can see in the photo some of the pipes are above the level of fluid in the reservoir. I'm sure this
is really OK, but I know Duncan had problems convincing the SVA inspector that this was fine. I might have to take
along a physics book with a discussion of siphons with me, or perhaps make him realise how a toilet works...
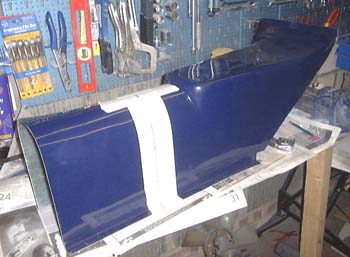 After that I had a bit of a look at the centre console. It's obvious that to fit the other bit of GRP
here, a large lump is going to have to be chopped off the back of it. I marked it out to try and show which bit,
but it's very hard to mark on account of nothing being square. The photo here shows just about where it's going
to have to be cut, which seems rather excessive. Luckily, there's a good overlap between the two tunnel mouldings
to take up any inaccuracy.
After that I had a bit of a look at the centre console. It's obvious that to fit the other bit of GRP
here, a large lump is going to have to be chopped off the back of it. I marked it out to try and show which bit,
but it's very hard to mark on account of nothing being square. The photo here shows just about where it's going
to have to be cut, which seems rather excessive. Luckily, there's a good overlap between the two tunnel mouldings
to take up any inaccuracy.
The other obvious problem with this is the flange on the bottom of the moulding. Just as one the rear moulding this is clearly going to have to go as it will be above the level of the lowered floor. Again, I am left wondering why Dax have made a moulding that cannot possibly fit the car.
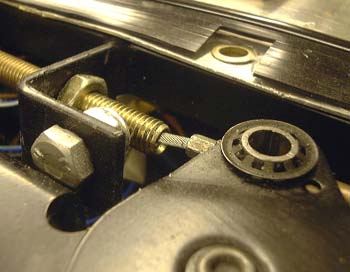 While looking at this I also was looking at the handbrake cable attachment. I was aware
a while ago that the cable didn't exactly go straight from the cable outer to the lever. I took the lever off and
tried to relieve it all a bit, but it still isn't too nice. I'm left again wondering why simple things like this
don't fit properly. Just because it probably won't make any difference is too poor an argument.
While looking at this I also was looking at the handbrake cable attachment. I was aware
a while ago that the cable didn't exactly go straight from the cable outer to the lever. I took the lever off and
tried to relieve it all a bit, but it still isn't too nice. I'm left again wondering why simple things like this
don't fit properly. Just because it probably won't make any difference is too poor an argument.
 Another weekend, and I managed to make a bit of progress this weekend, at long last.
I set about fitting the centre console and after a lot of cutting and grinding it fitted moderately well around the handbrake and its cable. However, it doesn't fit very well at the bottom where the shape of the lowered floor precludes, again, a proper fit. I'll have to bung up the gaps here somehow, but it's not clear how at the moment, short of taping over everything with gaffa tape.
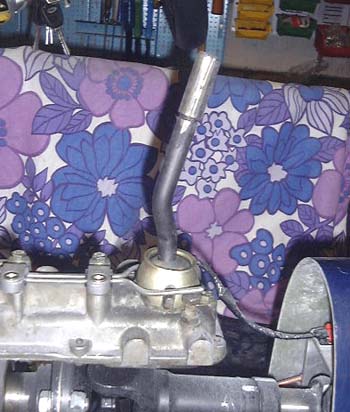 The next job was to cut the hole in the top of the tunnel for the gearstick.
However, the gearstick needed some attention first, as it was far too long.
Trevor Turner has written that it was possible to cut
the lever in two at the rubber joint in the middle, which is presumably intended for some sort of vibration reduction,
so I set about the gearstick with an angle grinder and after a lot of burnt rubber bits all over the garage it
looked like this picture.
The next job was to cut the hole in the top of the tunnel for the gearstick.
However, the gearstick needed some attention first, as it was far too long.
Trevor Turner has written that it was possible to cut
the lever in two at the rubber joint in the middle, which is presumably intended for some sort of vibration reduction,
so I set about the gearstick with an angle grinder and after a lot of burnt rubber bits all over the garage it
looked like this picture.
I may have to grind the top of the stick down a bit more to fit whatever I buy for a gearknob, but that can wait until I've bought something.
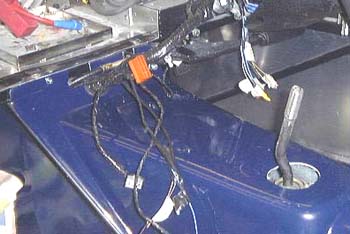 The last thing to do with the tunnel was to get the wiring loom to fit through
it. I did this by cutting a hole just under the slot that I'd cut for the handbrake cable and bodged a grommet
to fit around it properly. I could then get the tunnel back in with the wiring now coming out the right side. (Up
till this it had been unceremoniously shoved on the top of the gearbox.
The last thing to do with the tunnel was to get the wiring loom to fit through
it. I did this by cutting a hole just under the slot that I'd cut for the handbrake cable and bodged a grommet
to fit around it properly. I could then get the tunnel back in with the wiring now coming out the right side. (Up
till this it had been unceremoniously shoved on the top of the gearbox.
To be honest it would have been easier to do this before having put all the connectors, for example for the steering column switches, on the wiring. However, I did that ages ago and didn't feel like undoing it. One problem is that the cable for the wiper motor isn't going to reach far enough, I'll have to lengthen it slightly.
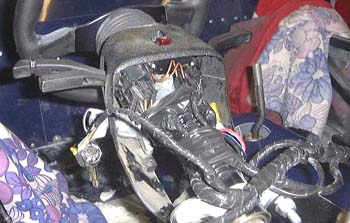 I then fitted some of the loom back into place. In particular I earthed the
loom to a stud I welded onto the steering column mounting brackets a while ago, and connected up the column cables
and taped it all into place. I then fitted the column shroud that came from the original Sierra. I'm not sure if
this is quite what I want, but something will have to cover up the column and this is the best I've got at the
moment.
I then fitted some of the loom back into place. In particular I earthed the
loom to a stud I welded onto the steering column mounting brackets a while ago, and connected up the column cables
and taped it all into place. I then fitted the column shroud that came from the original Sierra. I'm not sure if
this is quite what I want, but something will have to cover up the column and this is the best I've got at the
moment.
 Having done that, it was time to put the scuttle back on. This was fairly easy, as it had been fitted
a while ago. The only difficulty is that the heater makes it rather more difficult to get at some of the mounting
bolts, but not impossible.
Having done that, it was time to put the scuttle back on. This was fairly easy, as it had been fitted
a while ago. The only difficulty is that the heater makes it rather more difficult to get at some of the mounting
bolts, but not impossible.
I will have to at least loosen the scuttle later, as the kick strips actually locate unde the scuttle, but that should be easy to do later.
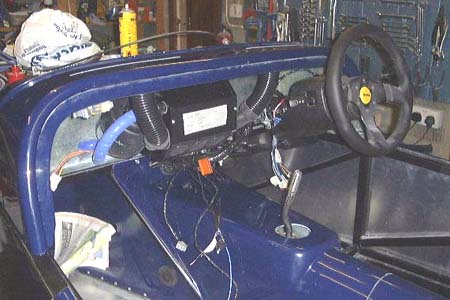
After this the car is looking rather more like a car. The tunnel separates the space into a couple of chunks and the scuttle makes the whole thing look better.
The next thing to think about is the instrument panel. At the moment it's hard to see how I'm even going to get the damn thing into position (probably have to take off that column shroud for one thing) let alone get it all working. The plan is to use a lot of connectors to make the panel essentially removeable. This at least means that I can do the bulk of the wiring in the kitchen, rather than in the garage.
in case you've got to this frame directly and can't get out, go here.