 I'm now starting to feel that I'm getting closer to the end of this build. Or, that I'm
getting to the point where planning for a shake-down test is a good idea.
I'm now starting to feel that I'm getting closer to the end of this build. Or, that I'm
getting to the point where planning for a shake-down test is a good idea.
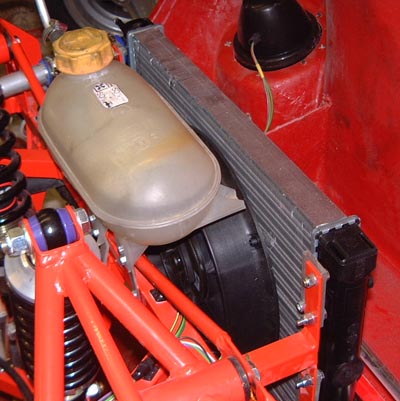
However, I did only manage to do a couple of little things today. First of all, I had ordered a cooling fan, having decided that the one that I already had was really a bit too large. I fitted this new fan, and wired it in fairly quickly. I used those rather naff, but very light, longtitudinal tie-wrap things that Pacet produce. At least the VW radiator has a built in boss for the fan switch which means there's no horrid capillary stuffed into the top hose the way there is on the Dax.
 As I promised a while ago, the next thing I did was to add another strap to
the fuel tank supports.
As I promised a while ago, the next thing I did was to add another strap to
the fuel tank supports.
I think that's now firm enough to withstand most things, hopefully with just a bit of flexibility.
 The exhaust that I'd bought off EBay arrived today. It's just straight off a Fireblade
and would, if it was going on a bike, really need some sort of re-painting. However, in my case it's going to be
hidden inside the sidepod so that's no big deal.
The exhaust that I'd bought off EBay arrived today. It's just straight off a Fireblade
and would, if it was going on a bike, really need some sort of re-painting. However, in my case it's going to be
hidden inside the sidepod so that's no big deal.
I phoned up Milner Offroad today and ordered some bits of stainless steel to attach this thing to the existing manifold. I guess I'll need some exhaust putty too, but I can probably find some of that somewhere.
I've started thinking about what to do about how to get the car shaken down (?). One possibility would be a track day such as the ones that Motorsport Events run at a local army airfield. The problem with this might well be the noise limit and consequently I'll borrow a noise meter from a local cam7er. The other possibility is the regular test days that are run at Mallory circuit. (To which I'm now allowed as I have a race licence.)
However, I need to maintain concentration and get the car finished (or at least driveable) first!
I borrowed a noise meter off Steve, another cam7 bod, today. So, once I get the exhaust sorted I can check how much noise the thing is actually producing. I also got on with fitting the exhaust as the stuff I had ordered yesterday arrived.
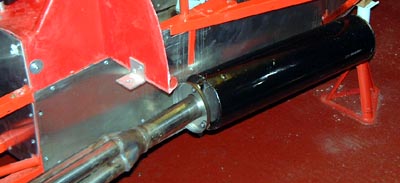 I lashed up the exhaust in position, roughly, and chopped bits off the existing
pipe until it was possible to fit the rear silencer on. Because of the side impact stuff the silencer has to be
positioned a bit far forward really. However, I think it's going to be OK.
I lashed up the exhaust in position, roughly, and chopped bits off the existing
pipe until it was possible to fit the rear silencer on. Because of the side impact stuff the silencer has to be
positioned a bit far forward really. However, I think it's going to be OK.
One of the things I got today was a silencer end-cap. I've seen people (specifically, my friend Dan) use these before for connecting a bike can to a manifold. First thing was to cut a big hole in the middle of this flange for the 2" pipe to go through. Then I lashed it up and worked out where the flange would have to be when it was all in place.
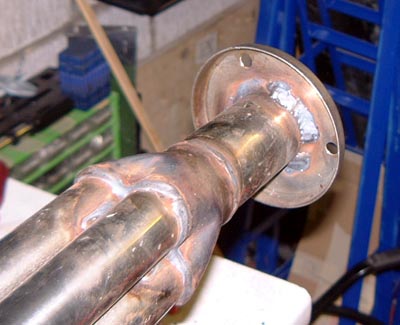 I could then tack weld the flange in place. Then, after taking the headers off
the engine again I could weld all the way around the flange.
I could then tack weld the flange in place. Then, after taking the headers off
the engine again I could weld all the way around the flange.
This was the first time I've ever welded stainless steel. I hope it will hang together!
 I then put the exhaust back on the car where it was now quite solid, although
obviously still a bit wibbly-wobbly at the rear.
I then put the exhaust back on the car where it was now quite solid, although
obviously still a bit wibbly-wobbly at the rear.
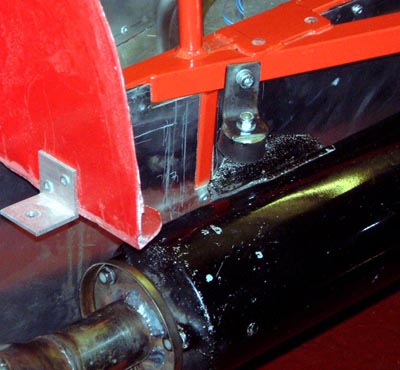 Hence, I made a small steel bracket to use with an exhaust mounting bobbin to
firm everything up. This is connected to the original 'blade mounting flange so should support things properly.
(It seems rather far forward though?)
Hence, I made a small steel bracket to use with an exhaust mounting bobbin to
firm everything up. This is connected to the original 'blade mounting flange so should support things properly.
(It seems rather far forward though?)
 With all that done (quite a good evening's work, I think!) I tried the engine carefully
(as it was a bit late to annoy the neighbours too much!). It's waaay better than it was before. However, it's blowing
(surprise, surprise) from the junction between the pipe flange and the can. It needs some sort of gasket/putty
to fill it all in.
With all that done (quite a good evening's work, I think!) I tried the engine carefully
(as it was a bit late to annoy the neighbours too much!). It's waaay better than it was before. However, it's blowing
(surprise, surprise) from the junction between the pipe flange and the can. It needs some sort of gasket/putty
to fill it all in.
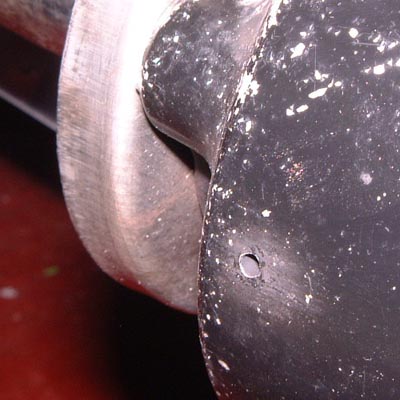
One slight concern is this little hole in the exhaust. I have a suspicion that this would be to make sure that any accumulated water drained out of the 'bike exhaust. It's about at where the bottom corner would be on the 'bike installation.
However, it's blowing a small (but eventually hot) jet of exhaust gases out at such a place that it will hit the GRP sidepod directly. (I will, of course, line it with heat reflective stuff.
I'll have to get something to bung up both this hole and the misfitting flange. GunGum, here I come...
 Another day, and more exhausting work. I decided to bung up those little holes above with
some blobs of weld. Easy done, but I'll probably discover in a while what they're for and have to drill them out
again.
Another day, and more exhausting work. I decided to bung up those little holes above with
some blobs of weld. Easy done, but I'll probably discover in a while what they're for and have to drill them out
again.
 I also had to make some sort of exhaust tailpipe, as the bike version won't get out of
the sidepod. I had ordered a 45° bend from Milner Offroad
which could be cajoled into the end of the bike can but would still not have got out of the sidepod. However, I'd
also ordered some straight pipe so I cut off a chunk and welded it to the bend giving me this device here. I attached
the bent bit to the tail of the exhaust using some self-tappers. (Yeuch...)
I also had to make some sort of exhaust tailpipe, as the bike version won't get out of
the sidepod. I had ordered a 45° bend from Milner Offroad
which could be cajoled into the end of the bike can but would still not have got out of the sidepod. However, I'd
also ordered some straight pipe so I cut off a chunk and welded it to the bend giving me this device here. I attached
the bent bit to the tail of the exhaust using some self-tappers. (Yeuch...)
 I then reassembled everything using some exhaust putty on the various joints
leaving it looking like this.
I then reassembled everything using some exhaust putty on the various joints
leaving it looking like this.
When I've got the sidepod back on I'll cut the tailpipe down so that it only just emerges from the sidepod.
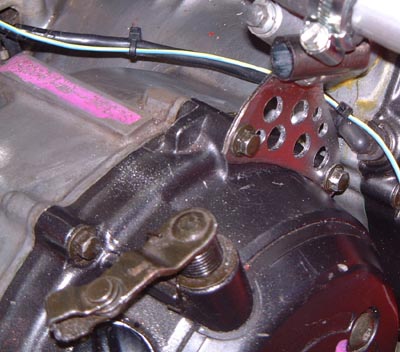 Something that I've been meaning to fix for a while is to do something about
the missing clutch bracket on the engine. At the moment this is making the clutch impossible to operate. I've had
a bit of a hunt trying to get a bracket from a breakers but have failed. So, I decided to make one a couple of
days ago.
Something that I've been meaning to fix for a while is to do something about
the missing clutch bracket on the engine. At the moment this is making the clutch impossible to operate. I've had
a bit of a hunt trying to get a bracket from a breakers but have failed. So, I decided to make one a couple of
days ago.
This is the result in position on the engine. It's just a bit of 2mm steel, cut and bent a bit, with a piece of tubing welded to it. I've also drilled a bunch of holes to lighten it a bit. The tubing will form the stay for the cable outer, but needs to be slotted first.
Presently, it's not finished as the cable refuses to go into the lever on the clutch. (It's the thing at the bottom of the photo). However, as soon as it gives in I can try it all for sixe.
 It turned out that the clutch cable bracket as introduced above was not positioned
properly. Once I'd persuaded the cable to go into the actuating lever itself it was clear that the bracket would
have to be modified to point the tubing part in a different direction. However, after a certain amount of cutting
and shutting that was done fine and it fitted as shown in the picture here.
It turned out that the clutch cable bracket as introduced above was not positioned
properly. Once I'd persuaded the cable to go into the actuating lever itself it was clear that the bracket would
have to be modified to point the tubing part in a different direction. However, after a certain amount of cutting
and shutting that was done fine and it fitted as shown in the picture here.
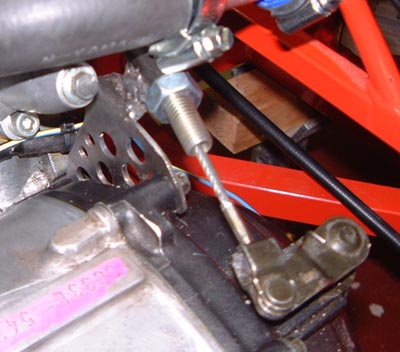
Attention then turned to the other end of the cable. After looking at things for a while it was clear that there was about 60mm of surplus slack in the cable if the other end of the cable was left as it was. This is all very odd as according to the manual the chassis should have a tube welded in for the clutch cable to go through. This tube can supposedly be cut to the desired length so as to make everything fit properly. If my chassis had such a tube then it would be easy to fit.
 After some thought I decided that the best solution
was indeed to have some sort of tubing. Hence I made the device that you can see here. This is just a piece of
aluminium tubing welded to a small piece of 3mm thick aluminium plate. I've bolted this to the chassis in the place
where the original tube ought to be/was.
After some thought I decided that the best solution
was indeed to have some sort of tubing. Hence I made the device that you can see here. This is just a piece of
aluminium tubing welded to a small piece of 3mm thick aluminium plate. I've bolted this to the chassis in the place
where the original tube ought to be/was.
As you can see, my aluminium welding (with a MIG welder) is no great shakes. However, it seems serviceable for things like this, although making fluid tight things is essentially impossible.
With that in position it was possible to finally fit the clutch cable. I jumped in the car and pressed it up and down in the approved foot-ish manner. It certainly feels like a clutch, but it remains to be seen how usable it is. (Getting the clutch pedal ratio right has been a bit of a bug-bear of bike-engined cars.)
 The 3/8" BSP taps I ordered a while ago from Engineering Supplies arrived today. (Plural because I ordered both a first tap and a bottoming
tap.) They've taken rather longer to arrive than I would have liked but this company does have the endearing approach
that they include a Mars bar with every order shipped. Of course, I need to eat Mars bars like I need a hole in
the head but when one just appears....
The 3/8" BSP taps I ordered a while ago from Engineering Supplies arrived today. (Plural because I ordered both a first tap and a bottoming
tap.) They've taken rather longer to arrive than I would have liked but this company does have the endearing approach
that they include a Mars bar with every order shipped. Of course, I need to eat Mars bars like I need a hole in
the head but when one just appears....
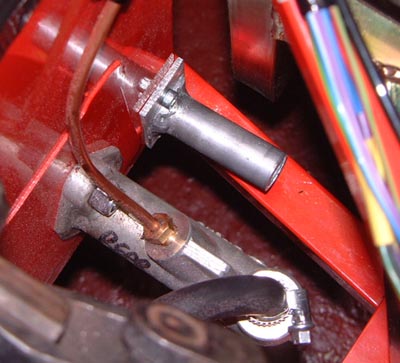
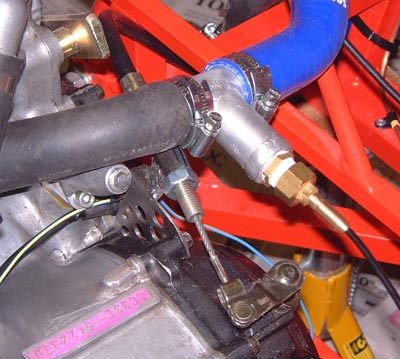
With the taps here I could tap the tee for the temperature sender that Adrian and I made a while ago for the water temperature sender. This was done and I drained out the coolant and changed the dummy tube I was using for this tee which puts the temperature sender in the top hose.
With that done, and having sorted the exhaust and cooling fan, I got the engine to run for long enough for things to actually get warm. This will also have the effect of making the exhaust putty go off properly.
This went fairly successfully although I was getting a little bit concerned that the engine doesn't seem to be quite as smooth as I would have thought. However, a lot of that could be due to it being (almost) hard mounted. As well, of course, as my unfamiliarity with bike engines.
However, running it was useful as the coolant did get up to temperature, the thermostat did open and eventually the fan came on to cool things down.
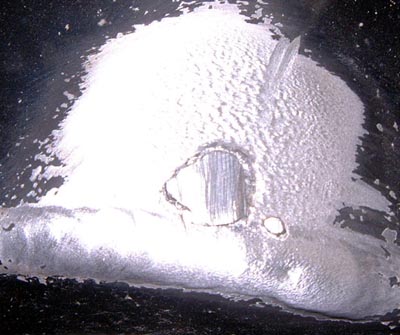
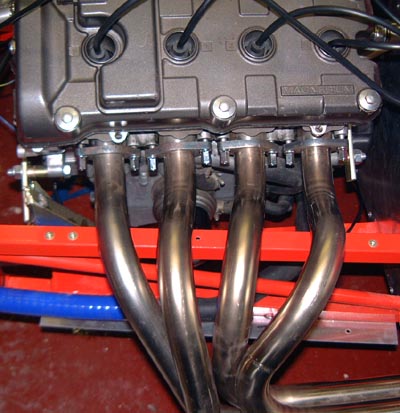 However, it does seem to be a bit lumpy and after hunting around I noticed the
colour of the exhaust headers, as in the picture.
However, it does seem to be a bit lumpy and after hunting around I noticed the
colour of the exhaust headers, as in the picture.
This looks as though cylinder 4 isn't contributing too much. In fact, I realised that the header was actually still pretty cold, compared to the others which are in the burning-the-skin-off-the-bone category.
My first thought was that this was to do with carburretor balance, in the way that a similar problem appeared with my Westfield ages ago. The thing is, the carbs certainly look to be balanced as the needle slides can be seen all moving pretty much in sync with each other.
So, after a bit of musing I thought I'd just check that there really was a spark. The plugs for cylinders 1 and 4 looked pretty similar but on experimenting looking for a spark I could not get anything with the plug that had been in cylinder 4. I found this hard to believe at first as I've never seen a plug that just plain didn't work, but I guess there's always a first time.
I checked this by swapping the number 1 and 4 plugs around. (Using these two because they're on the same, wasted spark, coil.) I then ran the engine again and by feeling the exhaust headers it was immediately obvious that cylinder 4 was now working and number 1 wasn't. Obviously, I need to go and get at least 1, and possibly 4, new plugs tomorrow. I seem to remember that bike engine plugs are made from solid platinum or something, so it'll probably not be cheap.