I went out and bought some new spark plugs following yesterday's notes about the duff plug. Unfortunately, I could only get two. (Actually, they had three but when I got home I discovered that one of them was the wrong type.) Unfortunately, a couple more of the plugs on the engine decided not to work anymore but at least I could replace them now (and the new ones seem to work fine). I'll try and get another two from a different place tomorrow. Problem is, I wonder why it's doing this, which seems very odd. Hopefully, it's not indicative of some much more deep seated problem.
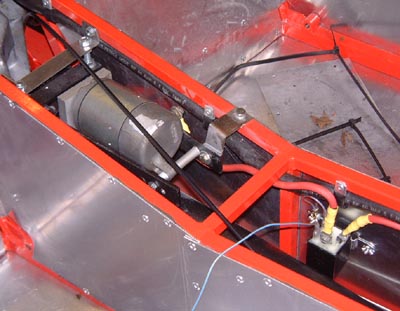 Next job was to finish filling up the transmission tunnel, which means the reverse
unit and the gearchange.
First of all I mounted the relay for the reverse motor. I chose, after some deliberation, to put it in the transmission pretty much next door to the reverse motor itself. There was the usual amount of wiring to do. However, at the end I tested it by just connecting the actuating side of the relay to the battery (that's the wire you can see hanging over the side of the tunnel). There was a rather unpleasant whirring noise and the gears shot around. However, there does seem to be a chance that when the gears are meshed first then the car will go backwards.
The thing that wasn't done, yet, was the lever that I will need to pull the gears into mesh before actuating the motor. However, as I wasn't sure where to mount the lever I thought I'd better mount the gearchange lever first as that one was rather more crucial.
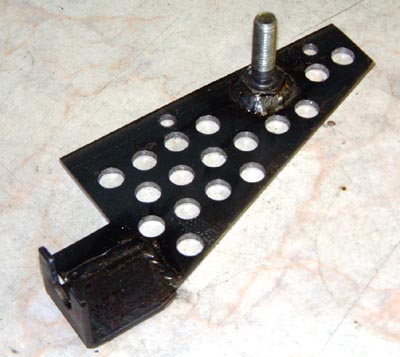 When I came to look at it, the lever assembly on Martin's gearchange was rather
on the agricultural side. The backing plate is made out of what looks like 14 swg steel, which seems a bit OTT.
Although, it isn't going to break!
So, after some judicious fiddling around working out where I wanted to mount it I finally decided that it would be best to chop a corner off the mount and to drill a few big holes to get rid of at least some of the excess weight.
I must admit, though, that I'm still considering remaking this bit out of aluminium instead.
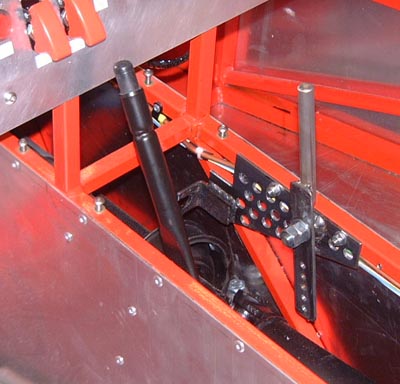 Anyway, I then spent a while working out where it had to go and eventually mounted
it inside the tunnel in the position you can see here. The lever itself is going to have to go on top of this this
one, and may well be bent a bit so as to end up in the right position. There is, though, a fair amount of variability
in the cable itself which should allow a certain amount of movement. I hope...
The lever is rather close to the prop and, if I don't have to use the lower holes, I may well cut the lower reaches of the lever away.
Having done that I can't do very much else yet as I'm still waiting for the brackets that go at the other end of the cable. If nothing happens soon I'm going to have to fabricate something else myself.
As to the reverse, I think it will just have to go behind the handbrake. I'll try and make it as small as possible; after all, it's not a very important control. What's more, the plan is to make it out of aluminium. I hope to make the lever itself out of some round alumium tubing that I've got. I've already bought a small push switch that just fits inside this tubing and will go quite nicely on the top of it.
I managed to do a fair bit to the car this weekend, although the proportion of real jobs to fiddly little things seems to be building up, as always seems to be the case. Before I got stuck into the car we went to Brian James in Daventry and ordered a trailer. I had been trying to find a second hand one but the only ones I found seemed rather scabby. After that we went to Grand Prix Racewear at Silverstone and bought a helmet. As always, I seemed to prefer the most expensive one in the shop...
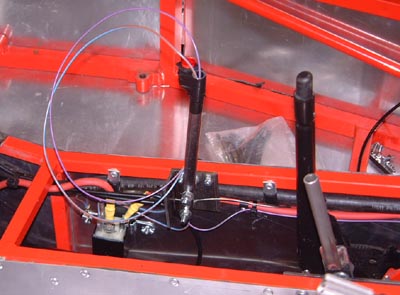 Back home it was back to the car so as to justify the purchases. First job was
to fit the reverse gear actuator lever. I actually backtracked on the aluminium version, as mentioned above, as
I decided it really wasn't going to be up to it. Mind you, as I write this I've thought of how to make it work.
Oh well. I did make the thing shown it the picture here. (All those wires are there because I haven't got the right
switch for it yet.)
I tried the mechanism, with the car up in the air. It makes a fearsome grinding noise but it does seem to work. The lever is actually not really too positive, but that seems to be due to the cable stretching. I think it would be much better with a solid actuator really. However it does work so I won't try to fix it.
Next thing was, I bled the brakes. That seemed to go very well. (I must admit to hating this job, as I really dislike getting fluid all over the place which always seems to be the inevitable consequence.) I seem to remember that the manual says that you have to take the rear drums off and tilt them so as to make sure that the bleed nipple is at the top. I didn't bother, yet, with this. All the same, the pedals still seems pretty firm.
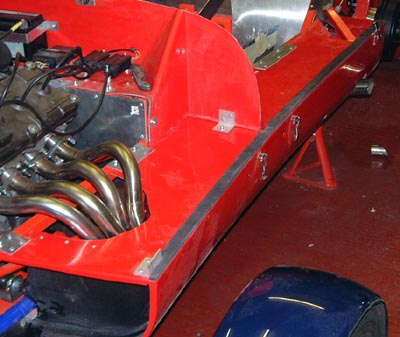 Next job was to get the left hand sidepod back on the car. (I took it off so
as to sort the exhaust.) I cut holes for the headers to snake into and for the tailpipe to stick out of, which
involved a great deal of trial and error. Eventually, though it fitted pretty neatly. I will have to take it off
again, though, so as to fit the thermal protection matting that I've got inside the 'pod. I'll also cut the tail
pipe down a bit more and, possibly, make some sort of ally trim around the tailpipe exit hole.
Actually, I probably won't. It is a race car, after all.
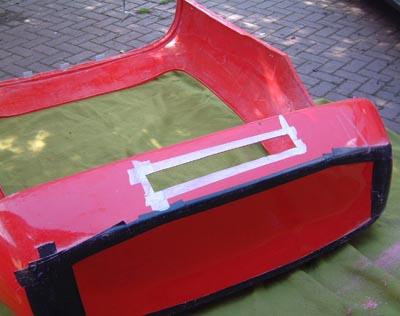 With that I put the wheels back on the car and opened the garage door. I wanted
to roll the car out today and it seemed a symbolic touch! However, in order to get the rear bodywork on, I needed
to trim it to fit around the tank properly.
The photo here shows the clearance that was needed for me. I will arrange for something to cover this up properly later, probably a bent bit of ally which may, or may not, be part of a "flat bottom" for the rear of the car.
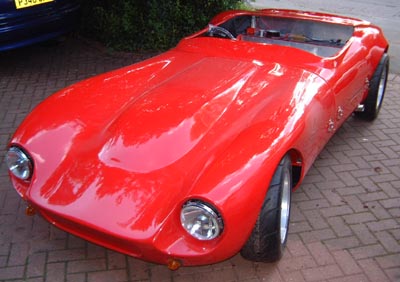 All the same, that allowed me to get the bodywork back on, for the first time for a few
weeks, and push it out of the garage. It's obvious that the wheel alignment is completely awful but at least it
can be moved.
However, without the roll cage on, it's rather hard to find anywhere to push it with!
Once on the drive, I ran the car for while and measured the noise generated. There was a particular track day that I was thinking about going to for a shakedown test. However it has a very low noise limit and my experiments seemed to show that there was no way I would be able to get the car to a state where I could drive it there.
Kind of odd sitting on the drive holding the engine at 8,000 rpm though.
Next thing was to try the electric reverse. The best thing that can be said for it is that it works. With a grinding of gears the car did indeed move backwards fairly smartly. As I said above, the actuator is not exactly positive, due to stretch in the cable I guess, but it does work.
I would have been really nice to try it moving forwards too, but I can't put the car into gear due to the lack of brackets mentioned above. I shall have to press Martin for a delivery date. I guess he's being messed around by his suppliers but it's getting a bit irksome.
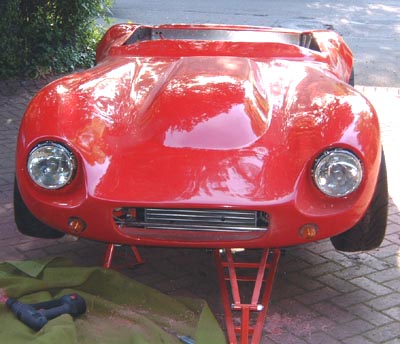 Some things were obvious out in the open. First of all the rear suspension is
way too high. Oddly, I lowered it as far as it would go and I'm still not sure that it's low enough. I'll have
to measure it properly soon.
I bought a quick lift jack a while ago and it was quite nice to be able to use it to lift the car in a fraction of the time that it normally takes. In the photo here it's sitting on the quick lift, in the position where I chopped out the radiator air inlet. I think most people fit a number of air outlets (holes to you and me) in the bonnet. I'll have to investigate that.
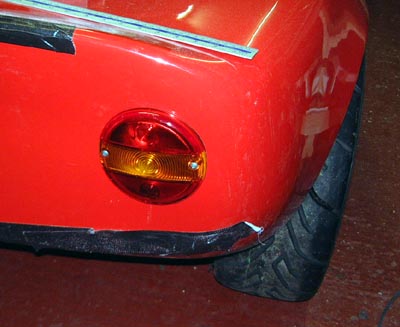 Finally, I pushed the car back into the garage and, rather later in the evening, cut out
the holes for the rear lights. The photo shows one of them, the only one that I've wired up as yet. I need, also,
to make some brackets to retain the lights inside the tub, but that shouldn't be too hard.
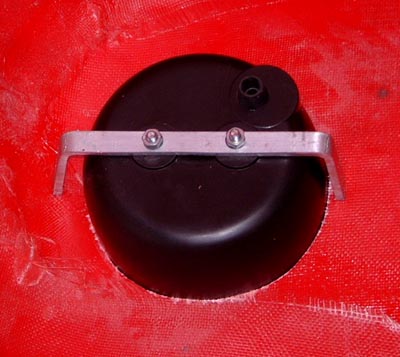 I didn't have much time today, due to not feeling well. However, I got a couple
of bits done. First of all was to make some retaining straps for the rear lights. These are just "U"
shaped bits of aluminium that go around the rear of the lights. To be honest, they're such a snug fit that I thought
about not bothering but it seemed like a bad idea on reflection.
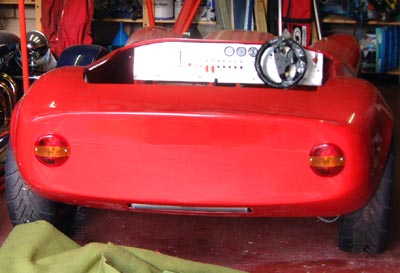 The rear of the car looks like this with the lights in. Not too bad, but the
back end of a Fury has never been its strong point. The later, and related, Phoenix design is much prettier at
the rear, in my opinion.
One problem is, though, that the wiring is rather difficult. The connectors I've used on the lights are rather too difficult to take apart for one-handed operation which is what is needed here. I'll probably try and get some more tomorrow, something that will mount onto the rear chassis meaning that the other part can just be fixed by hand would do nicely.
One thing I did do today was to phone Martin and ask about the still missing gearchange bracket. he said I could borrow his prototype, which is very good of him. So, I'll pop up there later this week and pinch it off him.
While on the phone I also asked about the suspension settings. At the moment the car is real comedy item as the wheels are pointing in a bizarre collection of directions. His answers were, for the record, as follows. However, don't just take this as gospel, ask him if you need to know. What's more, these are clearly just the starting points:
- Rear toe-in
- 10 minutes of arc toe-in each side.
- Rear camber
- 0.5 to 1 degree negative each side
- Front toe-in
- Parallel to very slight toe-in. Really, this means set it up parallel and then change it to suit the handling.
- Front camber
- 1.5 degrees negative each side.
Obviously, the camber is critically dependent on the ride height. This will be set so that the lowest point on the car (probably under the baffled sump when I've put it on) is 75 mm above the ground. (That's the RGB spec for minimum height.) After that, the front of the car should be set so as to be between 0.75 and 1" lower than the rear. In fact, when I rolled the car out at the weekend I had to set the car to the lowest possible ride height at the rear. I mentioned this to Martin and he said that other people had had the same problem. So, once I've got the car better set up I'll find out when anything needs to be changed. If there's enough damper travel then I can just get some shorter springs. If not, then I'll need some different dampers too.
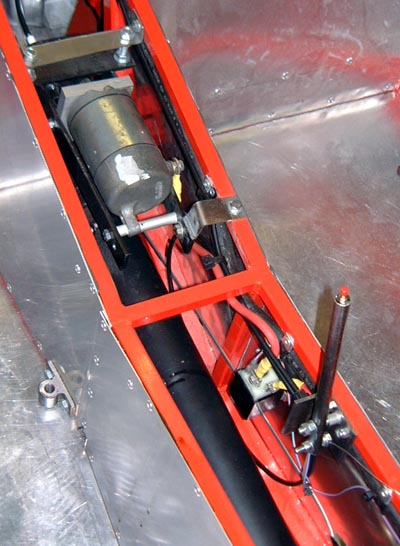 Finally, today, I changed the switch on the reverse to one that fitted in the
actuator lever. This is rather less chunky than I would have liked but is necessitated by the smaller tubing than
I was originally intending. (It's the little red blob at the top of the lever!)
Still, it looks a lot neater like this. I'll probably give the lever a spray of paint, though, as soon as I've got a moment.
At the end of the day, I started putting the car up on stands again. I want to take the sidepod off again and I need to get the gearchange sorted and the baffled sump fitted.
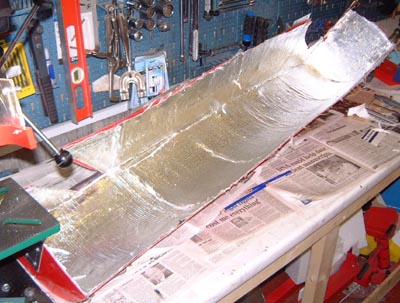 I guess I'm working down the to-do list now. I only
had a little time this evening so I finished putting the car back up on stands again and took off the left hand
sidepod. (Mounting it using rivnuts so that it can be bolted on and off easily was a really good idea.)
Once off I stuck aluminised heat resistant material all over the inside of the sidepod using some Würth adhesive.
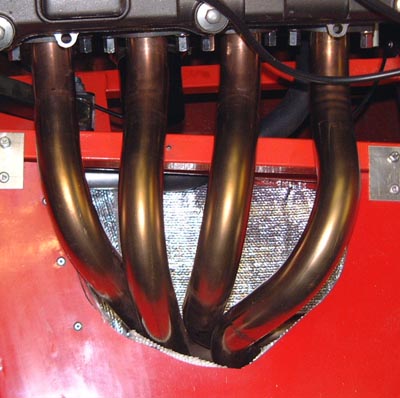 That was easily bolted back on the car, although inevitably I ended up with Würth
Black Death in places it should not have been; mainly on me and my clothes.
You can see the insulation by looking down past the headers. Hopefully, this will all stop the sidepod bursting into flames one afternoon...
I've found another track day that might do for a shakedown which is on June 5th. It would be nice to make that but I'm not sure if it's possible.
 No sooner do I think it might be possible to get to this trackday than I strike
a potential problem! The first thing that happened today was that my Dax went off to its new owner in Belgium.
There's a photo of it here on the Dax bit of this
site. It was very sad to see it go, but it does give me more space in the garage.
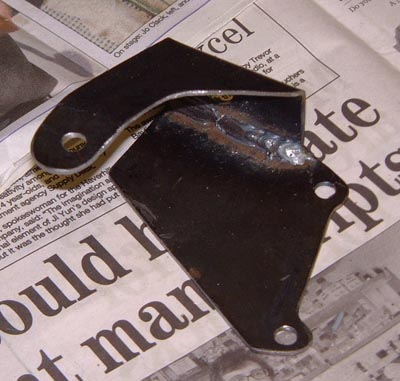
Hence, I moved the car into the middle of the, now huge, space and set about one of the remaining big bits, the gearchange. I went to the Kit Car Workshop today to borrow the prototype version of the bracket for the far end of the gearchange, on account of the fact that the real items haven't arrived yet. I also dropped in at MacKay's to get some steel with which to make a copy of it.
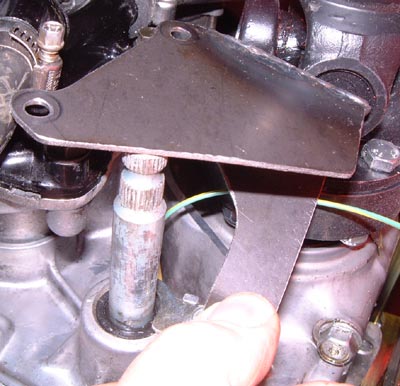 First thing, however, was to see how it fitted on the engine, and here the problems
started. Essentially I could not work out how to fit it to the engine. It's supposed to clamp onto some of the
water pump bolts and none of the likely bolts on my pump match the centres of the holes (on the right of the photo
above. Even if that did fit, the bracket is still in the way of both the propshaft and the selector lever itself.
It could be, of course, that I'm being a numpty and can't work out where to put it, but I don't think so. I suspect the issue is due to the number of layouts that Honda have used. For example, I am told that they've even changed the direction of the selector's effects once. What's more, the pump has definitely changed as some, like mine, have a drain plug built in whilst others, not mine, have an aid bleed that goes from the pump housing.
The photo here shows the bracket in what I think is just about the right place. (Although, as I think about it, there just has to be something wrong with this. The spacing of the holes on the left of the bracket is not correct. What's more, it will foul the selector rod and the propshaft itself.
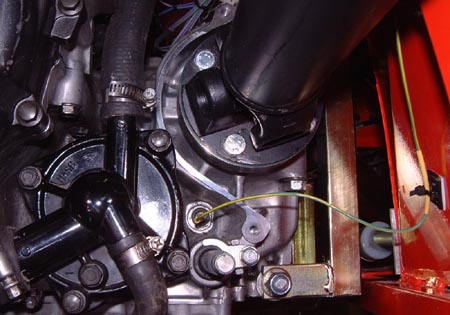 This photo shows the general environs of the gear selector. The selector rod
is the near the bottom centre of the photo, just under the wire to the neutral switch. The water pump is that thing
on the left and above you can see the propshaft.
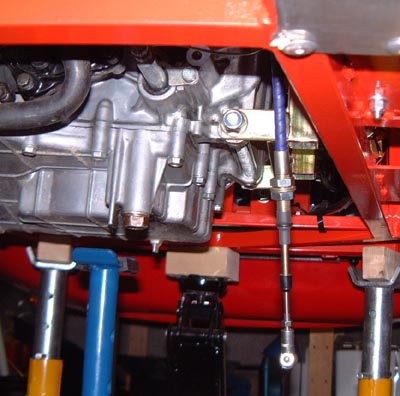 To add insult to injury, there was another problem. Even if the bracket could
be re-made to attach in the sort of position that it ought to be in, then the cable seems way too long.
In this photo you can just about see the gear selector at the top. The cable has been tied up it's taking just about the longest sensible route. It's still about 250mm too long. rom experimentation, the cable does not like being wrapped around at the sort of angles that are necessary to make it fit like this.
Not sure what to do about all this. I must admit to being a bit peeved. However, I'll phone Martin in the morning and see what he suggests. Mind you, writing this up has made me wonder about a different routing for the cable that I'm just going to go and try now...