It took me to the weekend to getting around to doing anything, on account of the week's news rather pushing everything else aside. I'm one of those people who grew up with the constant backdrop of the carnage in Vietnam and there's this horrible feeling that we're on our way back there again.
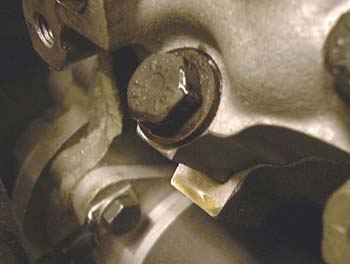 Anyway, I've noticed a potential serious problem in that there seems to be a very small
oil leak coming from under one of the heads. It's just a very small amount of oil collecting on what I think is
the datum point for the block face. I checked that the head bolts were tight, which of course they were. I'm not
sure what to do about. An engine like this is never going to be oil tight anyway but it might indicate a rather
more serious problem. Hmmm...
Anyway, I've noticed a potential serious problem in that there seems to be a very small
oil leak coming from under one of the heads. It's just a very small amount of oil collecting on what I think is
the datum point for the block face. I checked that the head bolts were tight, which of course they were. I'm not
sure what to do about. An engine like this is never going to be oil tight anyway but it might indicate a rather
more serious problem. Hmmm...
Anyway, I pressed on regardless, at least for now. I started fiddling around with the bodywork side and realised that I ought to put the washer bottle outlet pipe in while I could still get at it. So, I jammed in a bit of neoprene tubing, I'll have to sort out how it gets under the scuttle rather later on.
 So, I started again on the bodywork side. However, I was still having the problem
I mentioned a long time ago. This time I decided to grasp the
nettle and just cut all the way along the top of the panel. Gary at Dax said that this was possibly going to be
needed and I had run out of other possibilities.
So, I started again on the bodywork side. However, I was still having the problem
I mentioned a long time ago. This time I decided to grasp the
nettle and just cut all the way along the top of the panel. Gary at Dax said that this was possibly going to be
needed and I had run out of other possibilities.
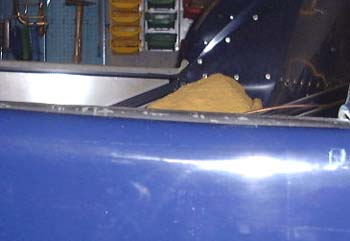
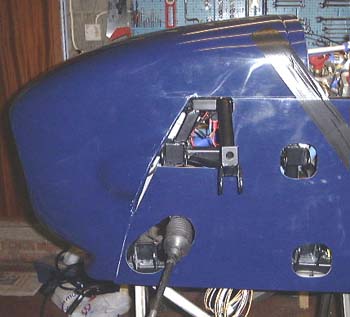
With this draconian step taken it was clear that the shape of the side panels is just wrong, in that it doesn't fit the chassis. Presumably this is an effect of the long wheelbase chassis.
To make this clear, if I sit the front part of the side down on the chassis properly, so that there isn't gap mentioned here then the top rear of side panel is an appreciable distance below the top of the chassis side. You can see this in the photo here, which shows where the top of the side is as compared with the chassis. If I sit the side up on top of the chassis then it's easier to fit now with the top sliced in two. However, there is still the gap under where the scuttle has to go. A fair bit of this can get squashed out, using the flexibility of the GRP but it's too much to completely brutalise it...
 Anyway, in the process of putting the sides, scuttle and nose cone on and off I became
aware of how cramped it was at the front of the engine. A while ago I had realised about a different place to put
the horns, having never really like the current position. It occurred
to me that without them where they were it would be easier to reach up from the bottom of the chassis. As far as
I can see this is going to be essential to get the suspension together.
Anyway, in the process of putting the sides, scuttle and nose cone on and off I became
aware of how cramped it was at the front of the engine. A while ago I had realised about a different place to put
the horns, having never really like the current position. It occurred
to me that without them where they were it would be easier to reach up from the bottom of the chassis. As far as
I can see this is going to be essential to get the suspension together.
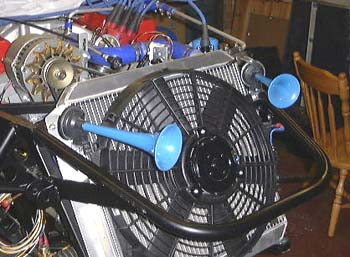
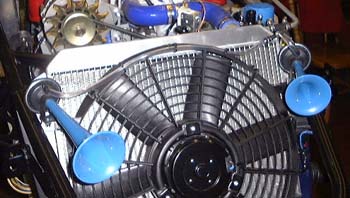
So, I got stuck and moved the horns to where you can see they are now. They're attached with a couple of little brackets to the mountings for the fan that I made a short while ago.
(Before you ask, yes they do fit under the nose cone, I checked.)
 After that I spent even more time shuffling the bits of bodywork around trying to decide how to go
about attaching things. There seem to be about a million variables in everything.
After that I spent even more time shuffling the bits of bodywork around trying to decide how to go
about attaching things. There seem to be about a million variables in everything.
I have become unconvinced about the supposed inaccuracy in the scuttle positioning mentioned before. This is for two reasons. First of all, with the scuttle further forward it becomes rather sider than the bodywork really wants to be.
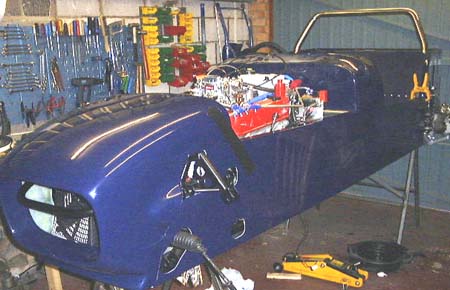
 Secondly, there's probably scope for moving the nose cone a bit further back. What seems to be stopping
at the moment is that the sides of the nose cone foul on the top front suspension mounting. It would probably be
possible to cut the GRP back a bit here to move the nose cone back a bit. It probably a good idea to do this for
another reason in that if you look at the car side on with the bodywork on you can see round the back of the nose
cone and see the radiator peeking back at you.
Secondly, there's probably scope for moving the nose cone a bit further back. What seems to be stopping
at the moment is that the sides of the nose cone foul on the top front suspension mounting. It would probably be
possible to cut the GRP back a bit here to move the nose cone back a bit. It probably a good idea to do this for
another reason in that if you look at the car side on with the bodywork on you can see round the back of the nose
cone and see the radiator peeking back at you.
I reckon that this means the nose cone could probably go back about 10mm. This will probably be all that's actually needed.
Of course, with my skill with bodywork this could just be the start of a horrible experience. Perhaps I ought to try cutting some chunks out of the nose cone first?
 I haven't done anything for a while, and today was just 10 minutes. In that time I just
plumbed in the horn that I hadn't managed to connect when I moved them a while ago. I had had to buy some more
air tubing from MacKays you see...
I haven't done anything for a while, and today was just 10 minutes. In that time I just
plumbed in the horn that I hadn't managed to connect when I moved them a while ago. I had had to buy some more
air tubing from MacKays you see...
As you can (nearly see) I kept it neat by tie-wrapping it to the fan shroud.
in case you've got to this frame directly and can't get out, go here.